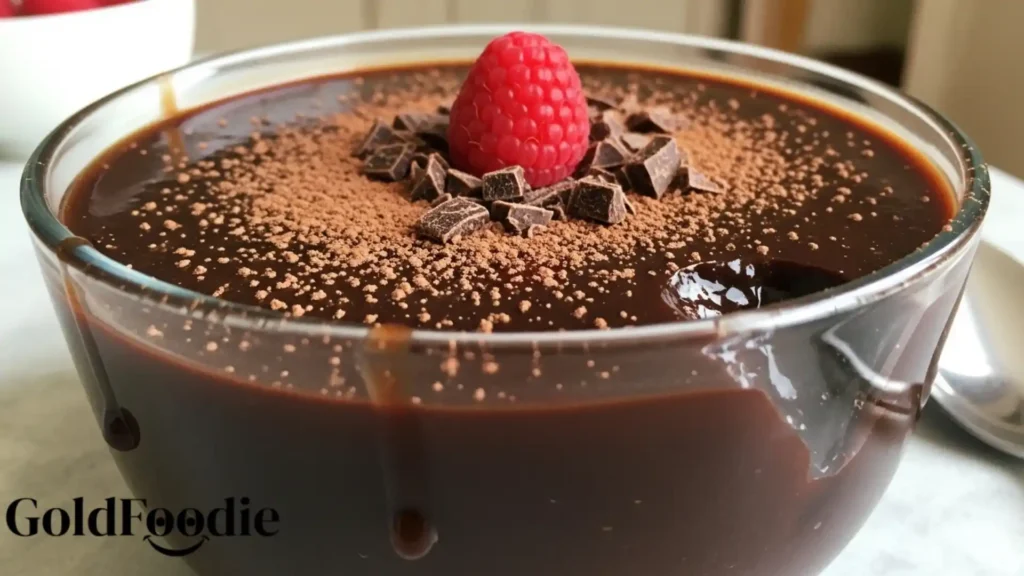
Indulge in pure bliss with this exquisite Chocolate Gelatin recipe. Imagine a dessert so rich, so smooth, yet perfectly light and guilt-free. I specifically crafted this Chocolate Gelatin to satisfy your deepest chocolate cravings, quickly and without fuss.
It’s a diabetes-friendly dream, perfect for busy parents seeking wholesome, delicious treats. This simple Chocolate Gelatin empowers healthy choices, tasting incredible every time.
Table of Contents
Why You’ll Love This Delicious Chocolate Gelatin Recipe
This Chocolate Gelatin isn’t just a dessert; it’s a wellness solution that genuinely tastes amazing and fits seamlessly into a busy lifestyle.
- Silky, Intense Chocolate Flavor: Experience deep cocoa satisfaction without an overwhelming sugar rush. This Chocolate Gelatin truly delivers on taste.
- Unbelievably Easy to Make: Whip up this delightful Chocolate Gelatin in minutes, perfect for busy schedules.
- Diabetes-Friendly & Wholesome: Enjoy a guilt-free indulgence that supports balanced blood sugar, made with ingredients you can trust.
- Family Favorite: A nutritious yet delicious treat that both kids and adults will adore.
- Supports Long-Term Wellness: A smart choice for anyone looking to incorporate healthier desserts into their routine.

Ingredients You’ll Need
Creating this spectacular Chocolate Gelatin starts with selecting high-quality ingredients. Prioritizing good quality, unsweetened cocoa powder and a reliable gelatin powder makes all the difference in flavor and texture. Remember, every ingredient plays a role in your long-term wellness journey, so choose wisely.
- Unsweetened Cocoa Powder: 1/2 cup (or more for intense flavor). Choose a good quality, dark cocoa powder for a rich depth.
- Granulated Sweetener: 1/2 cup (or to taste). Opt for a sugar substitute like erythritol, stevia blend, or monk fruit blend to keep it diabetes-friendly.
- Unflavored Gelatin Powder: 2 tablespoons. Look for grass-fed or high-quality bovine gelatin for best results and added nutritional benefits.
- Water: 2 cups cold, divided.
- Unsweetened Almond Milk (or other unsweetened milk): 2 cups. Almond milk keeps it low-carb and creamy. Coconut milk also works for a richer flavor.
- Vanilla Extract: 1 teaspoon. Pure vanilla enhances the chocolate beautifully.
- Pinch of Salt: Just a tiny pinch, it truly brings out the chocolate flavor.

Substitutions & Variations
Flexibility in the kitchen is key, especially when tailoring recipes to specific dietary needs or preferences. This Chocolate Gelatin recipe is wonderfully adaptable, allowing you to experiment while keeping it healthy and delicious. Here are some of my favorite healthy swaps and variations:
- Sweetener Alternatives: If you’re not strictly avoiding sugar, a small amount of maple syrup or honey can be used, but adjust the quantity carefully for your blood sugar management. Always opt for natural, unrefined options when possible. For a keto-friendly Chocolate Gelatin, ensure your chosen sweetener has zero net carbs.
- Milk Options: While unsweetened almond milk is my go-to, unsweetened cashew milk or even unsweetened coconut milk can add different layers of creaminess and flavor. For a richer, dairy-free version, a mix of almond milk and a small amount of full-fat coconut milk works wonders.
- Flavor Boosts: For an adult-friendly Chocolate Gelatin, a tiny splash of coffee extract or a tablespoon of sugar-free coffee liqueur can intensify the chocolate. A dash of peppermint extract transforms it into a mint chocolate delight. You could also add a pinch of cayenne pepper for a subtle Mexican chocolate kick!
- Protein Boost: Incorporate a scoop of unflavored collagen peptides along with the gelatin powder for an extra protein boost. This can make your Chocolate Gelatin even more satiating and beneficial for gut health.
- Textural Variations: For a lighter, airier Chocolate Gelatin, consider folding in a small amount of sugar-free whipped topping just before setting, creating a mousse-like consistency.
Remember, each substitution impacts the nutritional profile, so always consider your specific dietary goals. This versatility makes Chocolate Gelatin a staple for wellness-conscious families.
For more creative ideas on how to customize your favorite desserts, check out our recipe for Valentine’s Day Chocolate Bark. This recipe showcases how to blend flavors and textures for a delightful treat, making it a perfect companion to your Chocolate Gelatin.
Equipment You’ll Need
Having the right tools makes the process of creating this Chocolate Gelatin smooth and enjoyable. You won’t need anything fancy, just standard kitchen essentials.
- Medium Saucepan: For blooming and dissolving the gelatin and heating the liquids.
- Whisk: Essential for thoroughly combining ingredients and preventing lumps.
- Measuring Cups and Spoons: For accurate ingredient proportions.
- Heatproof Mixing Bowl: A large bowl to combine all ingredients before pouring.
- Serving Dishes or Molds: Individual ramekins, a large glass dish, or silicone molds for setting the Chocolate Gelatin.
- Spatula: For scraping down the sides and ensuring all ingredients are incorporated.
Step-by-Step Instructions
Making this healthy Chocolate Gelatin is incredibly straightforward. Follow these clear steps, and you’ll have a delightful, diabetes-friendly dessert ready to chill in no time. This method ensures a perfectly smooth and set Chocolate Gelatin every time.

- Bloom the Gelatin: In your medium saucepan, combine 1 cup of cold water with the unflavored gelatin powder. Sprinkle the gelatin evenly over the water. Let it sit undisturbed for 5-10 minutes. This process, called blooming, allows the gelatin granules to absorb water and swell, preventing lumps later.
- Heat the Liquids: After blooming, place the saucepan over medium-low heat. Add the remaining 1 cup of cold water, unsweetened almond milk, unsweetened cocoa powder, granulated sweetener, vanilla extract, and a pinch of salt.
- Dissolve and Whisk: Gently heat the mixture, whisking constantly, until the gelatin is completely dissolved and the cocoa powder and sweetener are fully incorporated. Do not boil the mixture; just heat until steaming and all solids have melted. This ensures a silky-smooth Chocolate Gelatin.
- Taste and Adjust: Carefully taste the mixture and adjust the sweetness or cocoa intensity if desired. Remember, flavors can mellow slightly when chilled.
- Pour into Molds: Remove the saucepan from the heat. Carefully pour the Chocolate Gelatin mixture into your chosen individual ramekins, a large glass dish, or silicone molds.
- Chill Until Set: Transfer the dishes or molds to the refrigerator. Chill for at least 4-6 hours, or preferably overnight, until the Chocolate Gelatin is firm and fully set. Patience here guarantees the best texture.
- Serve: Once thoroughly chilled and set, your delightful Chocolate Gelatin is ready to enjoy!
Once you’ve mastered the art of Chocolate Gelatin, consider trying our Chocolate Pizza for an indulgent twist. This fun recipe will add an exciting dimension to your dessert repertoire, making your healthy desserts even more enjoyable.
Pro Tips for Success
Achieving a perfect Chocolate Gelatin involves a few nuanced techniques. As Rocco, I want to share these insights to elevate your dessert-making experience and ensure consistent success with this diabetes-friendly treat.

- Proper Gelatin Blooming: Never skip the blooming step. Sprinkling gelatin over cold liquid and letting it sit prevents clumping and ensures a smooth, even set for your Chocolate Gelatin. Hot liquid causes the gelatin to clump instantly.
- Avoid Boiling: When heating the mixture, bring it just to a simmer. Boiling can degrade the gelatin’s setting power, resulting in a less firm Chocolate Gelatin. Gentle heat is your friend.
- Whisk Thoroughly: Continuous whisking while heating ensures that the cocoa powder and sweetener fully dissolve, preventing a grainy texture and ensuring uniform flavor throughout your Chocolate Gelatin.
- Chill Adequately: Resist the urge to serve too early. A full 4-6 hours, or even overnight, in the refrigerator allows the gelatin to set completely, yielding that delightful, firm-yet-silky texture.
- Grease Molds (Optional): If using intricate molds and planning to unmold your Chocolate Gelatin, lightly grease them with a neutral oil spray or a thin coat of oil before pouring. For easy unmolding, dip the bottom of the mold briefly in warm water before inverting.
- Pinch of Salt is Crucial: Don’t underestimate the power of a tiny pinch of salt. It doesn’t make the Chocolate Gelatin salty; instead, it remarkably enhances and deepens the chocolate flavor.
Storage & Reheating Tips
Proper storage ensures your homemade Chocolate Gelatin remains fresh, delicious, and safe to enjoy for days. This simple dessert is perfect for meal prepping healthy treats!
Once set, cover your Chocolate Gelatin tightly with plastic wrap or transfer it to an airtight container. Store it in the refrigerator for up to 5-7 days. The cool, stable environment of the fridge is essential for maintaining its firm texture and preventing spoilage.

This Chocolate Gelatin does not freeze well, as freezing and thawing can alter the gelatin’s texture, making it watery or rubbery. There’s no reheating necessary or recommended for gelatin; it’s best enjoyed chilled straight from the refrigerator.
To ensure the best flavor and texture, proper storage of your Chocolate Gelatin is key. After enjoying your dessert, learn how to store it perfectly by checking out our Decadent Pistachio Mousse with Chocolate Recipe, which offers tips on keeping your treats fresh.
What to Serve With This Recipe
This light and satisfying Chocolate Gelatin makes a wonderful standalone dessert, but it also pairs beautifully with a variety of healthy accompaniments. As a proponent of balanced meals, I suggest options that enhance the experience without adding unnecessary sugars or heavy ingredients. Enjoying your Chocolate Gelatin can be part of a larger, nutritious picture.
- Fresh Berries: A handful of fresh raspberries, strawberries, or blueberries adds a burst of tartness and natural sweetness, creating a vibrant contrast to the rich chocolate. Berries are packed with antioxidants and fiber.
- Sugar-Free Whipped Topping: A dollop of sugar-free whipped cream or coconut cream offers a light, airy contrast in texture and a subtle creaminess.
- Toasted Coconut Flakes: A sprinkle of unsweetened toasted coconut flakes provides a lovely crunch and a complementary tropical note.
- Chopped Nuts: For healthy fats and extra crunch, a small amount of finely chopped almonds or pecans works well, offering textural complexity.
- Side of Protein: Consider serving this Chocolate Gelatin as part of a meal that includes lean protein like grilled chicken or fish, and a vibrant salad. It acts as a perfect, light end to a wholesome dinner.
- After a Balanced Meal: This Chocolate Gelatin is ideal as a guilt-free dessert following a meal rich in lean proteins and non-starchy vegetables, aligning perfectly with a diabetes-friendly approach.
Frequently Asked Questions (FAQ)
Can I use agar-agar instead of gelatin for a vegan Chocolate Gelatin?
Yes, you absolutely can! Agar-agar is a fantastic plant-based alternative to gelatin, creating a similar jiggle and set for your Chocolate Gelatin. The ratio differs, though.
For this recipe, you would typically use about half the amount of agar-agar powder compared to gelatin powder (so roughly 1 tablespoon of agar-agar). Ensure you bring the mixture to a rolling boil for 1-2 minutes to properly activate the agar-agar, which isn’t necessary with traditional gelatin. This modification makes your Chocolate Gelatin entirely vegan-friendly.
How can I make this Chocolate Gelatin richer without adding more sugar?
To deepen the richness of your Chocolate Gelatin without increasing sweetness, focus on intensifying the chocolate flavor. First, use a high-quality, dark unsweetened cocoa powder. You can also increase the amount of cocoa powder by an extra tablespoon or two.
A tiny pinch of espresso powder or instant coffee granules (1/4 to 1/2 teaspoon) added with the cocoa powder will dramatically enhance the chocolate notes, making it taste more intense and decadent. Also, a tablespoon of unsweetened almond butter swirled in before chilling can add subtle richness and healthy fats to your Chocolate Gelatin.
Is this Chocolate Gelatin recipe suitable for children?
Absolutely! This Chocolate Gelatin is a wonderful, healthy dessert option for children, especially since it uses a sugar substitute. It offers a fun, jiggly texture and a universally loved chocolate flavor, without the refined sugars that can cause energy crashes.
Just ensure your children do not have any allergies to the ingredients, particularly the milk alternative. You can even involve them in the pouring process into fun molds, making it an engaging and nutritious family activity. This Chocolate Gelatin is truly a guilt-free pleasure for all ages.
Chocolate Gelatin is a delightful dessert that combines the rich flavors of chocolate with the unique texture provided by gelatin. This versatile dish is often enjoyed in various forms, adding a luxurious touch to any meal, which you can learn more about in this interesting article on gelatin.
Final Thoughts
This Chocolate Gelatin recipe embodies my mission: simplifying healthy eating for busy families. It’s a testament to how simple ingredients, carefully chosen, can create pure joy and support wellness. Empower your family with this delightful, diabetes-friendly treat!
Nutrition Information (per serving)
This information is an estimate based on the ingredients listed and chosen sweetener, for one of eight servings. Individual results may vary.
| Nutrient | Amount |
|---|---|
| Calories | 60-80 kcal |
| Total Fat | 3-5 g |
| Saturated Fat | 0-1 g |
| Cholesterol | 0 mg |
| Sodium | 30-50 mg |
| Total Carbohydrates | 5-8 g |
| Dietary Fiber | 2-3 g |
| Total Sugars | 0-1 g |
| Added Sugars | 0 g |
| Protein | 6-8 g |

Chocolate Gelatin
Ingredients
Method
- Bloom the gelatin by sprinkling it over 1 cup of cold water in a saucepan. Let it sit for 5-10 minutes.
- Heat the saucepan over medium-low heat, adding the remaining water, almond milk, cocoa powder, sweetener, vanilla extract, and salt.
- Whisk constantly until the mixture is steaming and all solids are dissolved. Do not boil.
- Taste and adjust sweetness and cocoa flavor if necessary.
- Pour the mixture into molds or ramekins.
- Chill in the refrigerator for at least 4-6 hours or overnight until set.
Notes

Diabetes Nutrition Specialist | Healthy Diet Advocate | Founder of GoldFoodie.
My passion for nutrition began with a deeply personal journey supporting my father through his battle with diabetes. Watching his daily struggles made me realize how powerful the right food choices can be in improving quality of life. That experience drove me to dedicate my career to helping others live healthier, more balanced lives.
- Rocco Fuhrman

- Rocco Fuhrman
- Rocco Fuhrman
- Rocco Fuhrman