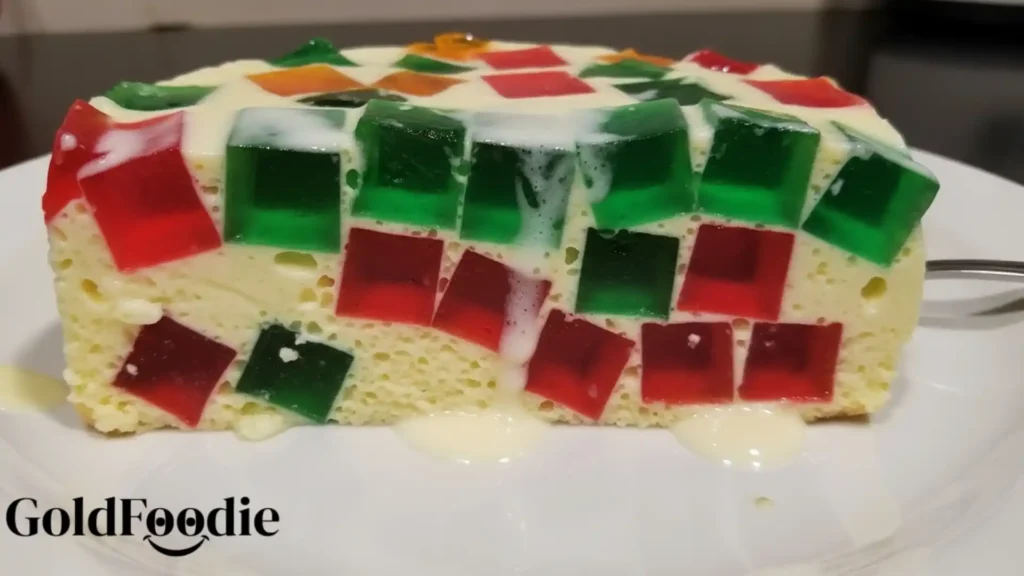
Imagine a dessert that’s both stunningly beautiful and wonderfully delicious: our Stained Glass Gelatin Cake. This vibrant, jiggly masterpiece offers a symphony of fruity flavors suspended in a creamy, light base. It looks incredibly intricate, like edible art, yet is remarkably simple to prepare, even for beginners.
Perfect for busy parents, this diabetes-friendly Stained Glass Gelatin Cake offers a guilt-free way to enjoy a colorful, refreshing treat that truly impresses. It’s time to create a dessert that excites the senses and fits your wellness goals effortlessly.
Table of Contents
Why You’ll Love This Stained Glass Gelatin Cake Recipe
Discover why this colorful dessert will become a family favorite.
- Dazzling Presentation: A beautiful mosaic, perfect for any occasion.
- Healthy Indulgence: Sugar-free and diabetes-friendly.
- Surprisingly Easy: Simple steps, impressive results.
- Flavorful Fun: Fruity and creamy, loved by all.

Ingredients You’ll Need
Quality ingredients are the foundation of any great, healthy recipe. Here’s what you’ll need to create your vibrant Stained Glass Gelatin Cake.
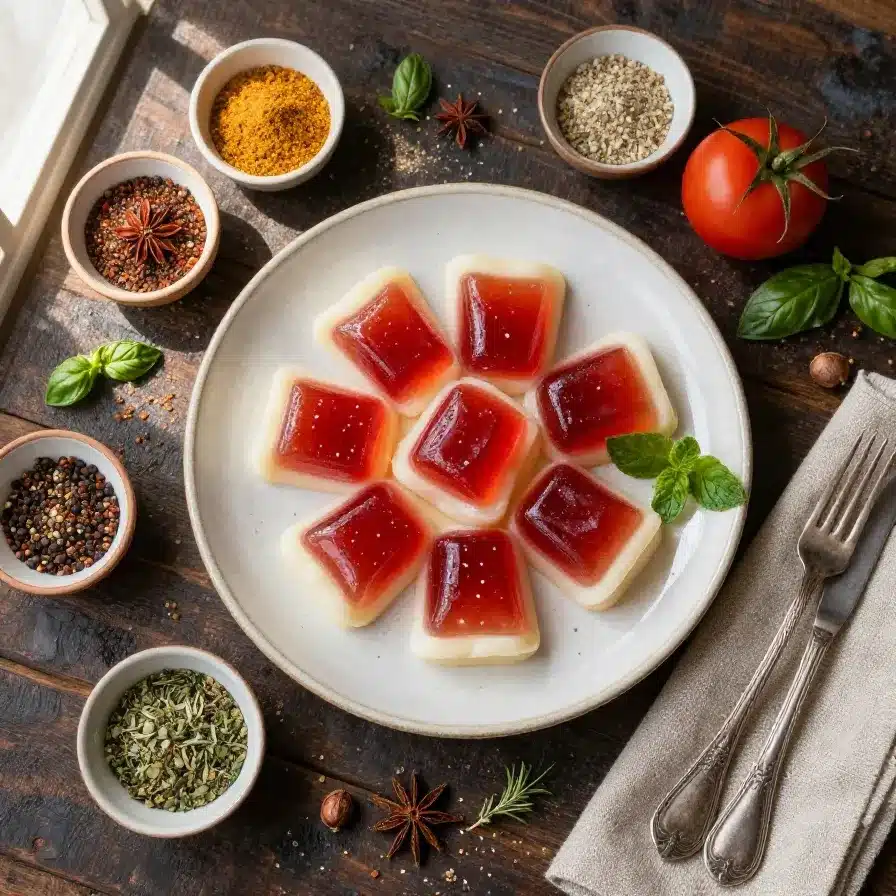
- Sugar-Free Gelatin Packets (4-5 different colors/flavors): Choose vibrant, sugar-free options (e.g., cherry, lime, lemon, blue raspberry) for a diabetes-friendly dessert. Quality gelatin ensures a firm set.
- Unflavored Gelatin Packets (2 envelopes): Crucial for the creamy white layer that binds our dessert.
- Boiling Water: Essential for dissolving the gelatin quickly and completely.
- Cold Water: Used for the setting process and to help cool the colored gelatin layers.
- Evaporated Milk (1 can, 12 oz, chilled): Provides a creamy, rich base without excessive fat or sugar. Chill for thickness.
- Sugar Substitute (equivalent to 1/2 cup sugar, e.g., erythritol or stevia blend): Sweetens the creamy layer without impacting blood sugar. Use a granular, heat-stable variety.
- Vanilla Extract (1 tsp): Elevates the creamy layer with warm aroma.

Substitutions & Variations
Flexibility is key for long-term wellness. Here are smart swaps for your Stained Glass Gelatin Cake.
- Dairy-Free Cream: Use chilled unsweetened full-fat coconut milk for a luscious, dairy-free alternative. Ensure it’s well-chilled for best results in your Stained Glass Gelatin Cake.
- Sweetener Options: Try monk fruit or allulose for the creamy base instead of erythritol.
- Extra Fruit Flavor: Add a few drops of natural fruit extracts (like strawberry or orange) to the clear gelatin layers for an extra pop of flavor without added sugar.
- Plant-Based Gelatin: Explore agar-agar for a vegan option for the colored layers (texture may vary). Always follow package instructions.
- Adjust Sweetness: While this Stained Glass Gelatin Cake uses sugar-free gelatin, you can further control sweetness by slightly reducing the sugar substitute in the creamy layer to your preference.
[ra_display_video url=”https://www.youtube.com/watch?v=W9vbL11lFDs”]
Incorporating flexibility into your diet can enhance wellness, especially with recipes like Stained Glass Gelatin. For creative twists on this dessert, check out our Stained Glass Gelatin for more dairy-free and flavorful options.
Equipment You’ll Need
Even the most intricate-looking desserts can be made with basic kitchen tools.
- 9×13 Inch Baking Dish (or similar size): Ideal for setting the gelatin cubes and the final Stained Glass Gelatin Cake. A glass dish allows for easy viewing.
- Large Mixing Bowls (4-5): One for each color of gelatin and another for the creamy white layer.
- Measuring Cups and Spoons: For accurate liquid and ingredient measurements.
- Whisk: To ensure gelatin dissolves completely and to blend the creamy layer smoothly.
- Sharp Knife: For neatly cutting the set colored gelatin into cubes.
- Rubber Spatula: For gently folding the gelatin cubes into the creamy mixture.
- Optional: Food coloring (for more vibrant colors): While not strictly necessary, a few drops can enhance the visual appeal of your colorful dessert.
Step-by-Step Instructions
Creating this beautiful Stained Glass Gelatin Cake is simpler than you think. Follow these clear steps for a showstopping dessert.

- Prepare Colored Gelatin Layers: In separate bowls, pour 1 cup of boiling water into each packet of sugar-free gelatin (e.g., cherry, lime, lemon, blue raspberry). Whisk until dissolved. Add 1 cup cold water to each bowl, stir well.
- Chill Colored Gelatin: Pour each colored gelatin mixture into separate shallow containers (about 1/2 to 1-inch thickness). Refrigerate for 3-4 hours, or until firm. This is crucial for structure.
- Cut Gelatin Cubes: Once firm, carefully cut each block of colored gelatin into small, roughly 1/2 to 3/4-inch cubes. Use a sharp knife. Gently loosen cubes.
- Prepare the Creamy White Layer: In a medium bowl, sprinkle two envelopes of unflavored gelatin over 1/2 cup of cold water. Let it sit for 5 minutes to bloom.
- Dissolve Unflavored Gelatin: Add 1.5 cups of boiling water to the bloomed unflavored gelatin, whisking constantly until completely dissolved.
- Combine Creamy Base Ingredients: Cool dissolved gelatin slightly (10 min). Whisk in chilled evaporated milk, sugar substitute, and vanilla until combined.
- Assemble the Stained Glass Gelatin Cake: Arrange the colorful gelatin cubes evenly in your large 9×13 inch serving dish. Keep them loose to allow the creamy mixture to flow.
- Add Creamy Layer: Slowly and gently pour the cooled creamy white mixture over the gelatin cubes. Ensure creamy mixture is cool enough not to melt cubes. This gentle pour maintains the mosaic effect.
- Final Chill: Refrigerate the entire Stained Glass Gelatin Cake for at least 4-6 hours, or preferably overnight, until completely set and firm. Patience ensures a perfect slice.
- Serve: Once fully set, cut your beautiful Stained Glass Gelatin Cake into squares or rectangles and serve chilled. Enjoy this vibrant, refreshing treat!
Making a beautiful Stained Glass Gelatin Cake is easier than it looks! To simplify the process and see more colorful variations, refer to our Pastel Rainbow Gelatin recipe for fun ideas.
Pro Tips for Success
Achieving that perfect Stained Glass Gelatin Cake involves simple tricks. As a parent, I’ve learned these insights help tremendously.

- Temperature is Key for Creamy Layer: Ensure your creamy white gelatin mixture is cool, but still pourable, before adding it to the colored cubes. If too hot, it melts the cubes. If too cold, it sets prematurely. Patience here yields a beautiful Stained Glass Gelatin Cake.
- Chill Thoroughly: Do not rush the chilling process for either the individual colored layers or the final Stained Glass Gelatin Cake. Proper setting is vital for clean cuts and a stable dessert. An overnight chill is always best.
- Even Cube Size: Aim for relatively uniform cube sizes. This makes your dessert more visually appealing and ensures even creamy layer distribution.
- Gentle Pouring: When adding the creamy layer, pour it slowly over the back of a spoon or a rubber spatula. This prevents cubes from shifting, preserving the mosaic effect.
- Use Quality Sugar Substitute: For the creamy layer, choose a granular, heat-stable substitute (erythritol, stevia blend) for reliable sweetness without aftertaste.
- Keep it Level: Ensure your serving dish is level in the refrigerator during both the initial colored gelatin setting and the final set of the entire Stained Glass Gelatin Cake. This prevents an uneven appearance.
- Non-Stick Spray (Optional but Helpful): Lightly grease your shallow dishes for the colored gelatin with a neutral cooking spray before pouring. This makes cutting and removing the cubes much easier.
Storage & Reheating Tips
Proper storage ensures your beautiful Stained Glass Gelatin Cake stays fresh for days, making healthy meal prep easier.

- Refrigeration is Key: Always store your Stained Glass Gelatin Cake in the refrigerator. Gelatin is perishable and will melt or spoil if left at room temperature for extended periods.
- Airtight Container: Cover remaining Stained Glass Gelatin Cake tightly with plastic wrap or transfer to an airtight container to prevent drying and odors.
- Shelf Life: When stored correctly, this delightful Stained Glass Gelatin Cake will remain fresh and delicious for up to 4-5 days.
- No Reheating: This is a chilled dessert and should not be reheated. Serve it directly from the refrigerator for the best texture and refreshing taste.
Proper storage methods can keep your Stained Glass Gelatin Cake fresh and delightful for days. Learn about maintaining its quality by checking our guidelines for Sicilian Lemon Jelly which includes tips on refrigeration and storage.
What to Serve With This Recipe
This Stained Glass Gelatin Cake truly shines as a light, refreshing dessert. For a balanced meal or spread, consider these healthy pairings that complement its vibrant flavors.
- Fresh Fruit Salad: Mixed berries, sliced kiwi, or melon add natural sweetness and antioxidants, complementing the dessert.
- Unsweetened Greek Yogurt: A small dollop alongside provides tanginess and a protein boost, a wonderful contrast to the sweetness.
- Mint Leaves: A sprig of fresh mint garnish adds a pop of color, refreshing aroma, and subtle flavor that pairs beautifully with the dessert.
- Light & Refreshing Beverage: Pair with sparkling water infused with lemon or cucumber, or a freshly brewed herbal iced tea for a complete, guilt-free experience.
- Lean Protein Sides: If serving as part of a meal, consider grilled chicken breast or a light fish dish to balance the sweetness of this vibrant treat.
Frequently Asked Questions (FAQ)
As Rocco, I often hear questions about healthy treats. Here are common inquiries about this Stained Glass Gelatin Cake.
Can I use regular gelatin instead of sugar-free?
While you certainly can, using sugar-free gelatin is a core component of making this Stained Glass Gelatin Cake diabetes-friendly and aligned with our mission for long-term wellness. Regular gelatin contains added sugars that would significantly increase the carbohydrate content, impacting its health benefits. If not sugar-concerned, texture remains, but nutritional profile changes. For optimal health, stick with sugar-free.
Why did my Stained Glass Gelatin Cake layers melt or get cloudy?
Several factors can lead to melting or cloudiness. First, ensure your colored gelatin cubes are fully set and cold before you pour the creamy white layer over them. Second, the creamy white layer itself must be cooled to room temperature, or even slightly chilled but still liquid, before assembly.
If it’s too hot, it will melt the cubes. Cloudiness in the clear layers often occurs if the gelatin isn’t fully dissolved, or if you stir it too vigorously, incorporating air bubbles. For best clarity and mosaic, be gentle and dissolve thoroughly.
Can I make this Stained Glass Gelatin Cake ahead of time?
Absolutely! This Stained Glass Gelatin Cake is an excellent make-ahead dessert, perfect for busy parents. In fact, making it the day before (or even two days) allows ample time for all the layers to set perfectly, resulting in cleaner cuts and a more satisfying texture.
Just ensure it’s tightly covered and refrigerated. It holds up for 4-5 days, ideal for parties or a healthy, ready-to-eat treat.
A Stained Glass Gelatin Cake is a vivid dessert that showcases colorful, flavored gelatin in a creamy base, making it visually appealing and delicious. This unique dessert can be enjoyed by those looking for lower-sugar options and can be found on various culinary resource platforms, exploring creative adaptations in gelatin recipes.
Final Thoughts
Creating this Stained Glass Gelatin Cake brings joy and health to your table. It proves that diabetes-friendly desserts can be both stunning and delicious, making wellness accessible for busy families. This vibrant treat empowers you to make smart, sustainable choices without compromise. Enjoy this dazzling masterpiece, a true testament to mindful eating and family well-being.
Nutrition Information (per serving)
Understanding your food is part of empowered wellness. Here’s a general nutritional breakdown for one serving of this Stained Glass Gelatin Cake, based on using sugar-free ingredients and evaporated milk.
| Nutrient | Amount |
|---|---|
| Calories | 85 kcal |
| Total Fat | 3.5 g |
| Saturated Fat | 2 g |
| Cholesterol | 15 mg |
| Sodium | 100 mg |
| Total Carbohydrates | 8 g |
| Dietary Fiber | 0 g |
| Sugars | 2 g (from milk lactose) |
| Protein | 6 g |
Note: Nutritional values are estimates and can vary based on specific brands of ingredients and serving size.

Stained Glass Gelatin Cake
Ingredients
Method
- In separate bowls, dissolve each packet of sugar-free gelatin in 1 cup of boiling water, then add 1 cup of cold water to each.
- Pour the colored gelatin mixtures into shallow containers and refrigerate for 3-4 hours until firm.
- Cut the firm colored gelatin into small cubes.
- In a bowl, sprinkle unflavored gelatin over 1/2 cup cold water and let bloom for 5 minutes.
- Add 1.5 cups of boiling water to the bloomed gelatin and whisk until dissolved.
- Cool the gelatin mixture slightly, then whisk in the chilled evaporated milk, sugar substitute, and vanilla extract.
- Arrange the colored gelatin cubes in a 9×13 inch dish, then gently pour the creamy mixture over the cubes.
- Refrigerate for at least 4-6 hours, preferably overnight, until set.
- Cut and serve chilled.
Notes

Diabetes Nutrition Specialist | Healthy Diet Advocate | Founder of GoldFoodie.
My passion for nutrition began with a deeply personal journey supporting my father through his battle with diabetes. Watching his daily struggles made me realize how powerful the right food choices can be in improving quality of life. That experience drove me to dedicate my career to helping others live healthier, more balanced lives.
- Rocco Fuhrman

- Rocco Fuhrman
- Rocco Fuhrman
- Rocco Fuhrman