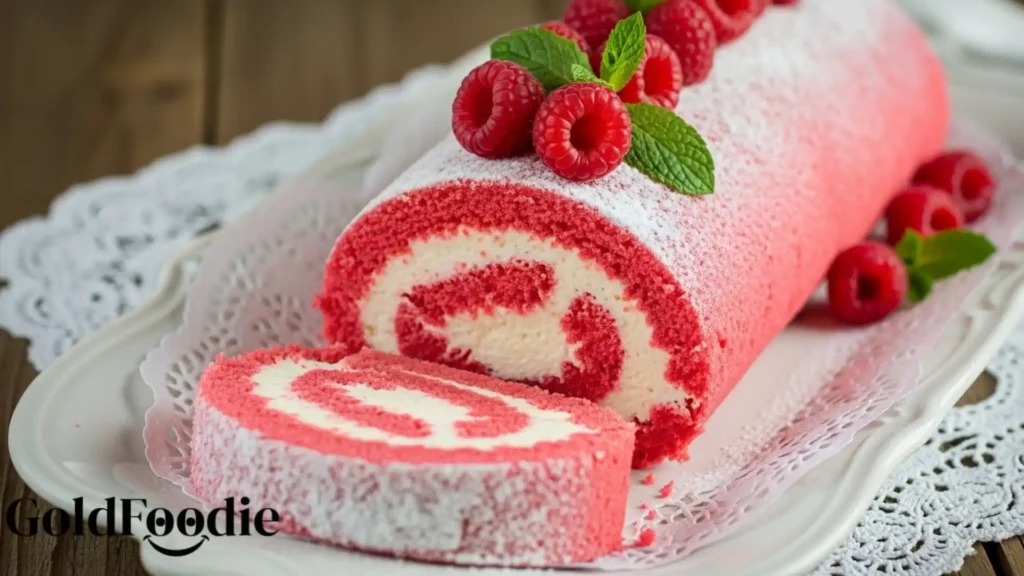
Embrace a dessert that truly energizes your spirit and satisfies your palate. This magnificent Pink Velvet Cake Roll offers a delightful harmony of tender, moist cake, subtly infused with a hint of cocoa, all wrapped around a luscious, tangy cream cheese filling. It’s an elegant showstopper that promises a truly vibrant experience.
As Anne Newgent, I believe in recipes that are as empowering as they are delicious, and this Pink Velvet Cake Roll exemplifies that philosophy, proving that wholesome indulgence is always within reach. Prepare to captivate your senses and fuel your vitality with every exquisite slice of this beautiful creation.
Table of Contents
Why You’ll Love This Pink Velvet Cake Roll Recipe
- Vibrant Flavor Profile: Experience the iconic velvety taste, perfectly balanced with a tangy cream cheese filling, making this Pink Velvet Cake Roll a truly memorable treat.
- Achievable Elegance: Master a visually stunning dessert with remarkably clear, step-by-step instructions, proving that gourmet creations are within everyone’s reach.
- Smart Indulgence: Learn how to create a balanced treat that supports your active lifestyle, avoiding the typical sugar crash often associated with desserts.
- Boost Your Vitality: Discover options to enhance the protein content, transforming this delightful Pink Velvet Cake Roll into a more nutritionally robust option for muscle preservation.

Ingredients You’ll Need
Crafting this exceptional Pink Velvet Cake Roll begins with selecting high-quality ingredients. Think of each component as a building block for your energy and well-being. Opt for fresh, vibrant items to ensure the best flavor and nutritional integrity. Remember, your body deserves the best fuel.
For the Pink Velvet Cake:
- 1 cup (120g) all-purpose flour: Choose unbleached for a finer texture.
- 1 teaspoon baking powder: Fresh baking powder ensures a perfect rise.
- ¼ teaspoon baking soda: This reacts with buttermilk for tenderness.
- ¼ teaspoon salt: A pinch enhances all the other flavors in this Pink Velvet Cake Roll.
- 2 tablespoons unsweetened cocoa powder: High-quality Dutch-processed for deep color and flavor.
- ½ cup (113g) unsalted butter, softened: Room temperature butter creams beautifully.
- 1 cup (200g) granulated sugar: Balances the tartness and provides structure.
- 2 large eggs: Pasture-raised eggs offer richer yolks and better nutrition.
- 1 teaspoon vanilla extract: Pure vanilla, never imitation, for true flavor.
- ½ cup (120ml) buttermilk: Ensures a moist, tender crumb.
- 1 tablespoon red food coloring: Gel food coloring provides the most vibrant pink hue.
For the Cream Cheese Filling:
- 8 ounces (226g) cream cheese, softened: Full-fat, good quality for a rich, tangy filling.
- ½ cup (113g) unsalted butter, softened: Essential for a smooth, stable frosting.
- 2 cups (240g) powdered sugar, sifted: Sifting prevents lumps and ensures a silky texture.
- 1 teaspoon vanilla extract: Complements the cream cheese and cake flavors.
- Pinch of salt: Elevates the sweetness and balances the tang.

Substitutions & Variations
Embracing a strong, active lifestyle often means optimizing your meals, and even desserts can be a part of that strategy. This Pink Velvet Cake Roll is wonderfully adaptable. For those focused on muscle preservation and vitality, consider these smart, healthy swaps.
They allow you to enjoy the deliciousness while still prioritizing your nutritional goals. These variations ensure your Pink Velvet Cake Roll aligns with your pursuit of sustained energy and well-being.
- Higher Protein Cake: Replace ¼ cup of the all-purpose flour with a high-quality, unflavored whey or casein protein powder. You might need to add an extra tablespoon or two of buttermilk to maintain the cake’s moisture. This small adjustment significantly boosts the protein content of your Pink Velvet Cake Roll.
- Reduced Sugar Cake: Substitute half of the granulated sugar with a natural sugar alternative like erythritol or stevia blend. Adjust to taste, remembering that some alternatives are sweeter than sugar. This helps manage blood sugar levels, contributing to sustained energy.
- Healthier Cream Cheese Filling: For a lighter, protein-boosted filling, use ½ of the specified cream cheese and replace the other ½ with plain, full-fat Greek yogurt (strained overnight for thickness). Reduce the butter slightly and adjust powdered sugar to taste, or use a natural sweetener.
- Natural Coloring: Achieve a lovely pink hue using natural sources like beet powder (start with 1-2 teaspoons, adding more for desired color) or a small amount of concentrated beet juice instead of red food coloring.
- Gluten-Free Option: Use a 1:1 gluten-free baking flour blend in place of all-purpose flour. Ensure your chosen blend contains xanthan gum for structure. This allows everyone to enjoy this delightful Pink Velvet Cake Roll.
- Flavor Variations: Add ½ teaspoon of almond extract to the cake or filling for a subtle nutty note, or a touch of orange zest for brightness.
Note: This video is for demonstration purposes and may use a slightly different methode.
Embracing a strong, active lifestyle often means optimizing your meals, and even desserts can be a part of that strategy. This Pink Velvet Cake Roll is wonderfully adaptable. For those focused on muscle preservation and vitality, consider these smart, healthy swaps. They allow you to enjoy the deliciousness while still prioritizing your nutritional goals. Check out more ways to enjoy this delightful dessert in the Pink Velvet Cake.
Equipment You’ll Need
Having the right tools simplifies the baking process and ensures a successful outcome. For this Pink Velvet Cake Roll, precision and efficiency are key. Gather these essentials before you begin your culinary adventure.
- 15×10-inch jelly roll pan: Essential for achieving the perfect thin cake layer for rolling.
- Parchment paper: Prevents sticking and aids in the rolling process.
- Electric mixer (stand or hand-held): For creaming butter and sugar, and whipping the filling.
- Large mixing bowls: For separating dry and wet ingredients.
- Sifter: Ensures lump-free flour and powdered sugar.
- Rubber spatula: For folding and scraping bowls.
- Measuring cups and spoons: Accurate measurements are crucial for baking success.
- Wire cooling rack: For cooling the cake evenly.
- Clean kitchen towel: A crucial tool for rolling the warm cake.
Step-by-Step Instructions
Preparing this exquisite Pink Velvet Cake Roll is an empowering experience. Follow these clear, concise steps to achieve a perfectly rolled, beautifully flavored dessert. Precision and attention to detail will ensure your cake is tender, and your filling is creamy, making every bite a delight. You are capable of creating this masterpiece.

Step 1: Prepare Your Pan and Preheat Oven
- Preheat your oven to 375°F (190°C).
- Line a 15×10-inch jelly roll pan with parchment paper, allowing an overhang on the longer sides. Grease the parchment paper lightly with cooking spray or butter. This prepares your canvas for the Pink Velvet Cake Roll.
Step 2: Combine Dry Ingredients
- In a medium bowl, whisk together the flour, baking powder, baking soda, salt, and cocoa powder. Sifting these ingredients ensures an even distribution and prevents lumps in your Pink Velvet Cake Roll.
Step 3: Cream Butter and Sugar
- In a large mixing bowl, using an electric mixer, cream together the softened butter and granulated sugar on medium speed until light and fluffy, about 2-3 minutes. This aeration creates a tender crumb for the Pink Velvet Cake Roll.
Step 4: Add Eggs and Vanilla
- Beat in the eggs one at a time, mixing well after each addition.
- Stir in the vanilla extract.
Step 5: Alternate Dry and Wet Ingredients
- In a small bowl, whisk together the buttermilk and red food coloring.
- Gradually add the dry ingredients to the wet ingredients in three additions, alternating with the buttermilk mixture, beginning and ending with the dry ingredients. Mix on low speed until just combined. Do not overmix; overmixing develops gluten and can make your Pink Velvet Cake Roll tough.
Step 6: Bake the Cake
- Pour the batter evenly into the prepared jelly roll pan and spread it to the edges with an offset spatula.
- Bake for 12-15 minutes, or until the cake springs back when lightly touched and the edges are slightly pulling away from the pan. Avoid overbaking, as this can make your Pink Velvet Cake Roll dry and prone to cracking.
Step 7: Prepare for Rolling
- While the cake bakes, lay a clean, thin kitchen towel on a flat surface and dust it generously with powdered sugar. This prevents the cake from sticking as you roll it.
Step 8: Roll the Warm Cake
- Immediately upon removing the cake from the oven, invert it onto the prepared sugared towel.
- Carefully peel off the parchment paper.
- Starting from a short end, tightly roll the warm cake and towel together.
- Place the rolled cake, seam-side down, on a wire rack and let it cool completely, for at least 1 hour. This crucial step trains the cake to hold its rolled shape, preventing cracks when you add the filling to your Pink Velvet Cake Roll.
Step 9: Prepare the Cream Cheese Filling
- While the cake cools, prepare the filling. In a large bowl, beat the softened cream cheese and butter with an electric mixer until smooth and creamy.
- Gradually add the sifted powdered sugar, vanilla extract, and a pinch of salt. Beat on low speed until combined, then increase to medium-high and beat until light and fluffy. Do not overbeat, or the filling may become too thin.
Step 10: Fill and Chill the Cake Roll
- Once the cake is completely cool, carefully unroll it.
- Spread the cream cheese filling evenly over the entire surface of the cake, leaving a ½-inch border on all sides.
- Carefully re-roll the cake, without the towel, tightly but gently.
- Wrap the Pink Velvet Cake Roll tightly in plastic wrap and refrigerate for at least 1-2 hours (or up to overnight) to allow the filling to set and the flavors to meld.
Step 11: Serve and Enjoy
- Before serving, you can dust the top of the Pink Velvet Cake Roll with a little extra powdered sugar for an elegant finish.
- Slice with a sharp knife and serve your delicious Pink Velvet Cake Roll.
Preparing this exquisite Pink Velvet Cake Roll is an empowering experience. Follow these clear, concise steps to achieve a perfectly rolled, beautifully flavored dessert. Precision and attention to detail will ensure your cake is tender, and your filling is creamy, making every bite a delight. For delicious decoration ideas, explore the Pink Velvet Cake Topper.
Pro Tips for Success
Mastering the Pink Velvet Cake Roll involves a few strategic techniques that ensure a flawless finish and an incredibly tender crumb. These insights, born from experience, will empower you to create a dessert that not only looks stunning but also tastes divine, aligning with your high-efficiency approach to vitality.

- Do Not Overbake: This is perhaps the most critical tip for any cake roll. An overbaked cake will be dry and brittle, making it very difficult to roll without cracking. Watch for the cake to spring back when gently touched and the edges to just begin pulling away from the pan.
- Roll While Warm: The cake must be rolled while still warm and pliable, immediately after it comes out of the oven. This “trains” the cake to hold its shape. If you wait for it to cool, it will stiffen and crack.
- Generous Powdered Sugar Dusting: Do not skimp on dusting the kitchen towel with powdered sugar. This crucial step prevents the warm cake from sticking to the towel, making the unrolling process much smoother.
- Sift Dry Ingredients: Sifting flour and cocoa powder aerates them and removes any lumps, resulting in a lighter, more tender cake texture for your Pink Velvet Cake Roll.
- Room Temperature Ingredients: Ensure butter, cream cheese, and eggs are at proper room temperature. This allows them to cream together effectively, creating a smooth batter and a lump-free, airy filling.
- Even Batter Spread: Spread the batter evenly in the jelly roll pan, all the way to the edges. An even thickness ensures consistent baking and a uniform roll.
- Gentle Unrolling: When unrolling the cooled cake to add the filling, do so slowly and carefully. If it resists, let it sit for a few more minutes at room temperature.
- Chill Thoroughly: After filling, wrapping and chilling the Pink Velvet Cake Roll is essential. This allows the filling to firm up and the cake to set, making it much easier to slice cleanly.
Storage & Reheating Tips
Maintaining the freshness and integrity of your Pink Velvet Cake Roll is key to enjoying its deliciousness over several days. Proper storage preserves its tender texture and vibrant flavor, ensuring every slice is as good as the first. This approach minimizes waste and maximizes enjoyment.

- Refrigeration is Key: Store the Pink Velvet Cake Roll tightly wrapped in plastic wrap or in an airtight container in the refrigerator. This is crucial because of the cream cheese filling.
- Longevity: When properly stored, your Pink Velvet Cake Roll will remain fresh for up to 3-5 days in the refrigerator.
- Freezing for Later: For longer storage, you can freeze the whole, unfilled cake roll (wrapped tightly) for up to 1 month. Thaw in the refrigerator before unrolling and filling. A filled Pink Velvet Cake Roll can also be frozen, wrapped well, for up to 2-3 weeks, though the texture of the filling may change slightly upon thawing.
- Serving Temperature: For the best flavor and texture, allow the Pink Velvet Cake Roll to sit at room temperature for about 15-20 minutes before serving, especially if it’s been chilled overnight. This softens the filling slightly.
- No Reheating: This is a cold dessert and does not require or benefit from reheating.
Maintaining the freshness and integrity of your Pink Velvet Cake Roll is key to enjoying its deliciousness over several days. Proper storage preserves its tender texture and vibrant flavor, ensuring every slice is as good as the first. This approach minimizes waste and maximizes enjoyment. To enhance your dessert experience further, don’t miss the recipe for Pink Velvet Cheesecake.
What to Serve With This Recipe
While this Pink Velvet Cake Roll stands gloriously on its own, thoughtful pairings can elevate the experience and align with your pursuit of balanced, high-efficiency nutrition. Think of complements that enhance the flavors without overwhelming them, contributing to your overall vitality and energy. These suggestions ensure your dessert moment is both delightful and smart.
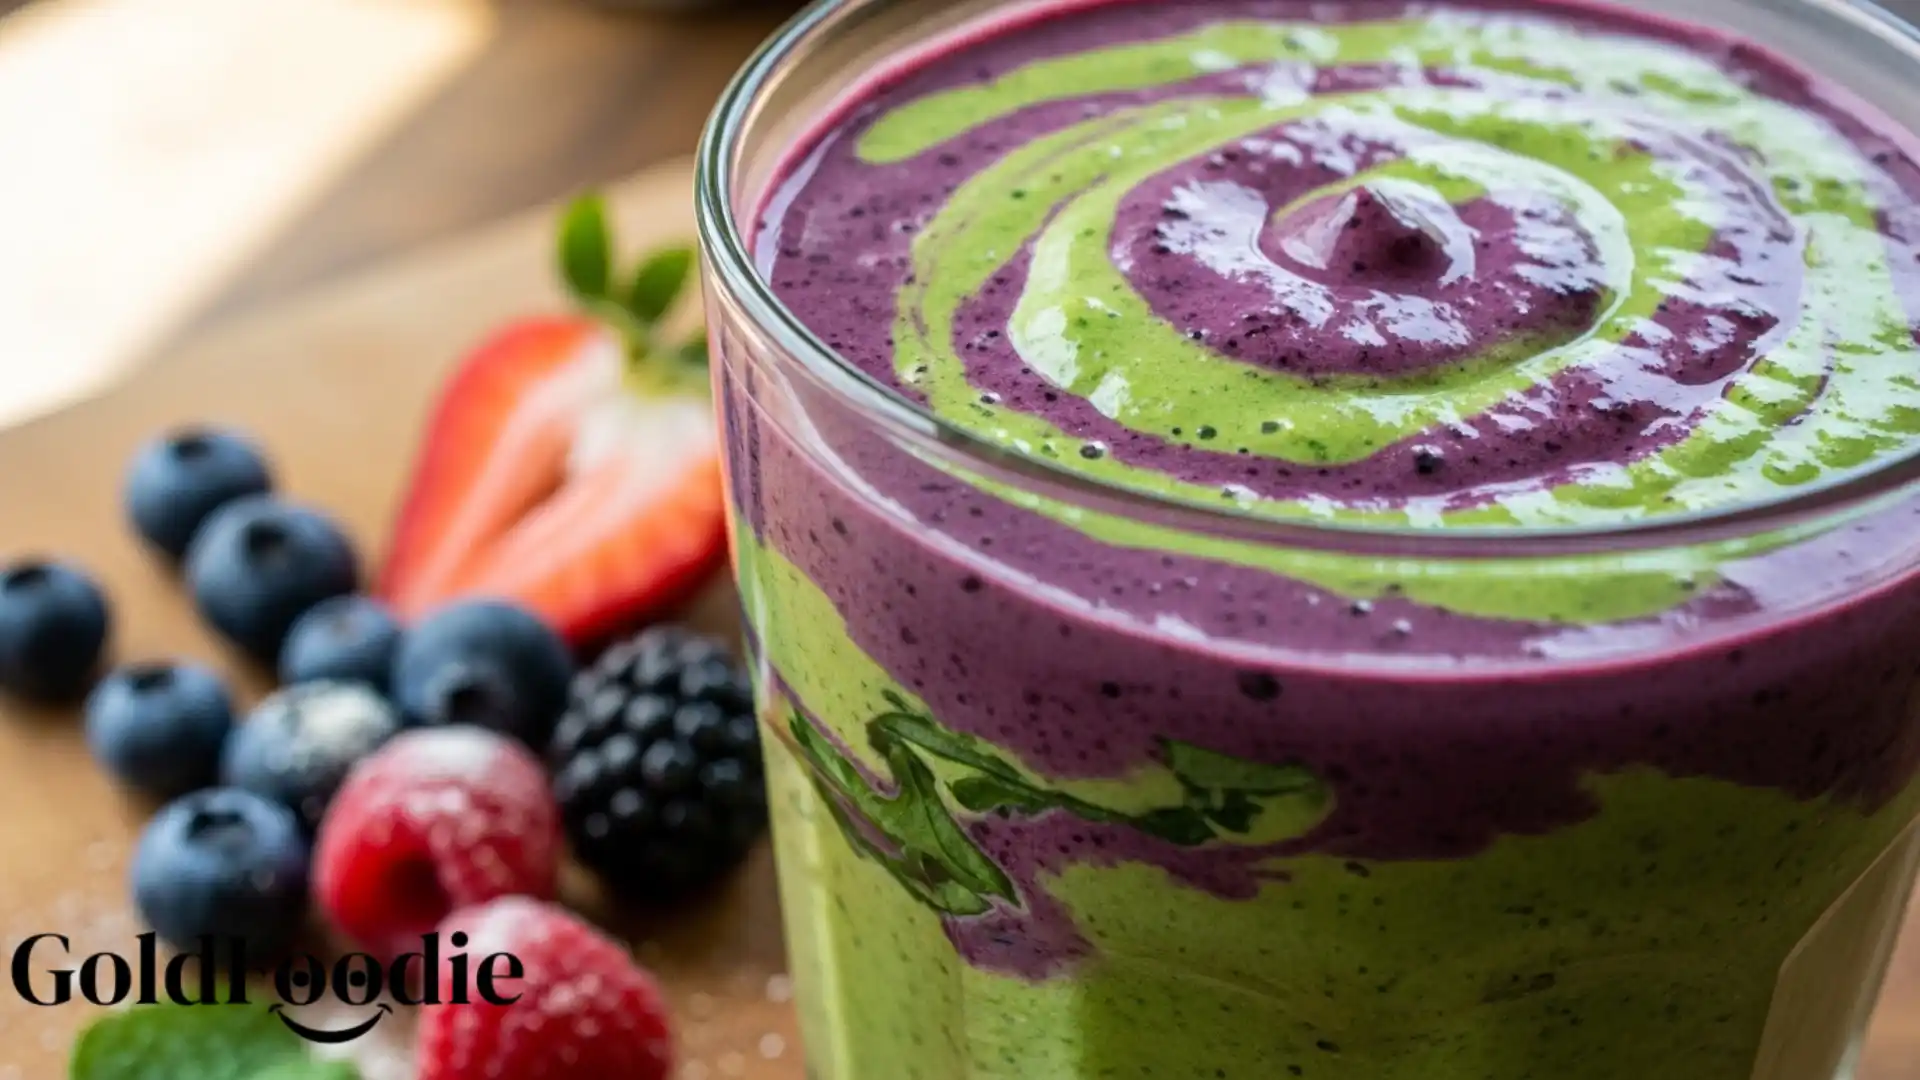
- Fresh Berries: A vibrant medley of fresh strawberries, raspberries, or blueberries offers a refreshing contrast to the richness of the cake. Berries provide antioxidants and natural sweetness, perfectly complementing your Pink Velvet Cake Roll.
- Plain Greek Yogurt: A dollop of unsweetened Greek yogurt provides a creamy, tangy counterpoint and a significant protein boost, turning your dessert into a more balanced treat.
- Lightly Whipped Cream (Unsweetened): For those who enjoy a little extra decadence, a cloud of unsweetened or lightly sweetened whipped cream adds airiness without excessive sugar.
- Nut Butter Drizzle: A very light drizzle of thinned almond or cashew butter can add healthy fats and a subtle nutty flavor, enhancing the nutritional profile of your Pink Velvet Cake Roll.
- Aromatic Coffee or Herbal Tea: A freshly brewed cup of coffee or a comforting herbal tea (like mint or chamomile) provides a warm, soothing beverage that pairs beautifully with the sweet richness of the cake, aiding digestion.
- Toasted Almond Slivers: A sprinkle of lightly toasted almond slivers adds a delightful crunch and healthy fats, enriching the textural experience of each bite of your Pink Velvet Cake Roll.
Frequently Asked Questions (FAQ)
Can I make the Pink Velvet Cake Roll ahead of time?
Absolutely! This Pink Velvet Cake Roll is an excellent make-ahead dessert, perfect for busy professionals. You can bake the cake and roll it in the towel, letting it cool completely and store it at room temperature for up to a day.
The filling can also be made a day in advance and stored in the refrigerator. Assemble the cake roll 1-2 days before serving for best results, allowing the flavors to meld beautifully. Just ensure it’s tightly wrapped in plastic wrap and refrigerated.
How do I prevent my Pink Velvet Cake Roll from cracking when rolling?
Preventing cracks is a common concern. The key is to roll the cake while it’s still warm and pliable, immediately after it comes out of the oven. Do not wait for it to cool.
Ensure your kitchen towel is generously dusted with powdered sugar to prevent sticking. Rolling it tightly and allowing it to cool completely in its rolled shape “trains” the cake. An underbaked or overbaked cake is more prone to cracking, so precise baking time is also crucial for your Pink Velvet Cake Roll.
Can I increase the protein content of this Pink Velvet Cake Roll even further?
Yes, you certainly can! Beyond the suggestions in the “Substitutions & Variations” section, consider adding a scoop of unflavored collagen peptides to the cake batter (it’s heat stable).
For the filling, you could blend in a small amount of unflavored whey or casein protein powder, or increase the Greek yogurt ratio. Serving your slice of Pink Velvet Cake Roll with a side of high-protein plain Greek yogurt or a protein shake further boosts your intake, aligning perfectly with your muscle preservation goals and dynamic lifestyle.
The Pink Velvet Cake Roll is a delightful twist on traditional dessert recipes, combining the rich flavor of cocoa with the lightness of a roll cake. This unique treat is not just visually appealing but also offers a deliciously tangy cream cheese filling that enhances its taste. For more on similar recipes, see this page on cake.
Final Thoughts
This Pink Velvet Cake Roll transcends mere dessert; it’s a testament to empowered living. Crafting it invigorates your spirit, fueling both body and mind. It’s a vibrant reminder that delicious indulgence and a high-performance lifestyle beautifully coexist.
Reclaim your vitality, one delightful slice at a time, and inspire strength in every sweet moment. This Pink Velvet Cake Roll will be a staple.
Nutrition Information (per serving)
The following is an estimated nutritional breakdown for one slice of Pink Velvet Cake Roll (assuming 12 slices per roll), based on standard ingredients. Values may vary with substitutions.
| Calories: | 350 kcal |
| Protein: | 5g |
| Fat: | 18g |
| Carbohydrates: | 45g |
| Fiber: | 1g |
| Sugars: | 35g |

Pink Velvet Cake Roll
Ingredients
Method
- Preheat your oven to 375°F (190°C) and line a 15×10-inch jelly roll pan with parchment paper, greasing it lightly.
- In a medium bowl, whisk together the flour, baking powder, baking soda, salt, and cocoa powder.
- In a large mixing bowl, cream together the softened butter and granulated sugar until light and fluffy, about 2-3 minutes.
- Beat in the eggs one at a time, followed by stirring in the vanilla extract.
- In a small bowl, whisk together the buttermilk and red food coloring. Gradually add the dry ingredients to the wet ingredients, alternating with the buttermilk mixture.
- Pour the batter evenly into the prepared pan and bake for 12-15 minutes.
- While the cake bakes, dust a clean kitchen towel with powdered sugar and prepare for rolling.
- Once baked, invert the cake onto the sugared towel and carefully peel off the parchment paper. Roll the cake with the towel and let it cool completely.
- Prepare the cream cheese filling by beating the softened cream cheese and butter until smooth, then gradually adding the powdered sugar, vanilla extract, and pinch of salt.
- Once the cake is cool, unroll it carefully, spread the filling evenly, and re-roll without the towel.
- Wrap the rolled cake tightly in plastic wrap and refrigerate for at least 1-2 hours.
- Before serving, dust with powdered sugar, slice, and enjoy.
Notes

High-Protein Nutrition Specialist and Wellness Advocate with over a decade of experience.
My human-first approach blends science-backed guidance with real-life empathy, shaped by my own journey through fatigue and muscle loss. Today, I help people reclaim strength, energy, and confidence through high-protein nutrition that’s both practical and empowering.
- Anne Newgent

- Anne Newgent
- Anne Newgent
- Anne Newgent