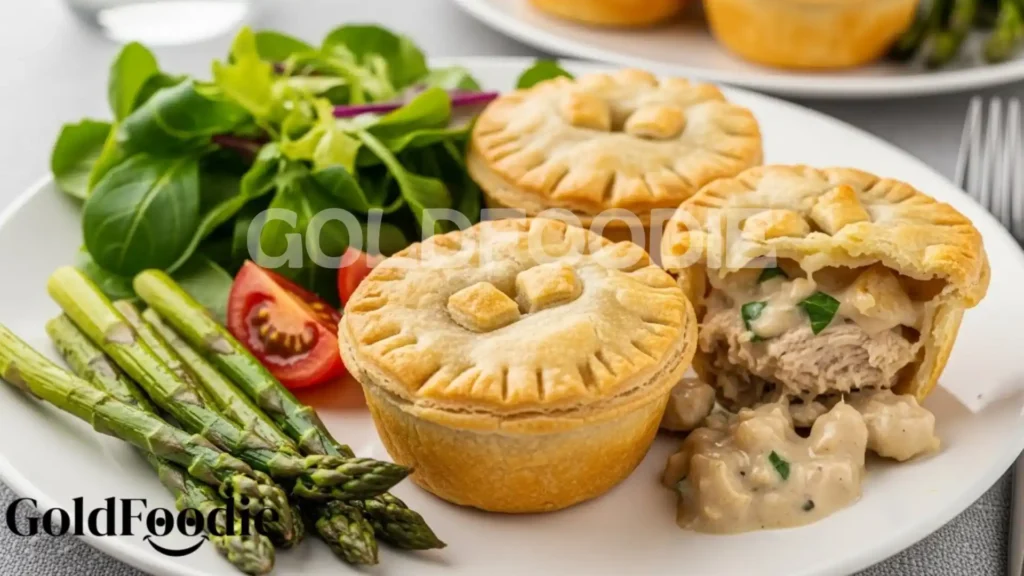
Imagine tender chicken and vibrant vegetables bathed in a creamy, savory sauce, all encased in a golden, flaky crust. My Mini Chicken Pot Pies offer the ultimate blend of hearty flavor and balanced nutrition, crafted specifically to simplify your meal prep. These individual portions are a beacon of healthy eating for busy families, bringing comfort and peace of mind to your table. Get ready to transform your dinner routine with this irresistible classic, reimagined for modern wellness.
Table of Contents
Why You’ll Love These Mini Chicken Pot Pies
- Effortless Health: Quick prep, wholesome ingredients, and portion-controlled for balanced meals.
- Flavorful Comfort: All the classic, soul-satisfying taste in a healthier package.
- Family-Friendly: A guaranteed hit with kids and adults, making dinner a breeze.
- Wellness Warrior Approved: Diabetes-friendly and built for sustainable long-term health.

Ingredients You’ll Need
- For the Filling:
- 2 tablespoons olive oil
- 1 medium yellow onion, finely diced
- 2 carrots, peeled and finely diced
- 2 celery stalks, finely diced
- 2 cups cooked chicken breast, shredded or diced (leftover rotisserie chicken works beautifully)
- 1 cup frozen peas, thawed
- 1 cup low-sodium chicken broth
- 1/2 cup unsweetened almond milk (or other milk of choice)
- 2 tablespoons whole wheat flour (or gluten-free flour blend)
- 1 teaspoon dried thyme
- 1/2 teaspoon garlic powder
- Salt and black pepper to taste
- For the Crust:
- 2 sheets reduced-fat puff pastry or whole wheat pie crusts, thawed
- 1 large egg, whisked (for egg wash)
Substitutions & Variations
Note: This video is for demonstration purposes and may use a slightly different methode.
Elevate your Mini Chicken Pot Pies with simple, healthy swaps. Use whole wheat pie crust for more fiber, or swap carrots for sweet potatoes. Dairy-free milk and gluten-free flour make these Mini Chicken Pot Pies adaptable for various needs, ensuring everyone enjoys this comforting dish.
Consider adding other flavorful recipes to your repertoire, such as Queso Chicken Enchiladas which can offer an exciting twist to your dinner table with a creamy and cheesy flavor that pairs well with Mini Chicken Pot Pies.

Equipment You’ll Need
- Muffin tin (standard 12-cup)
- Large skillet or Dutch oven
- Mixing bowls
- Measuring cups and spoons
- Rolling pin
- Round cookie cutter (approx. 3.5-4 inches diameter)
- Whisk
- Pastry brush (optional, for egg wash)
Step-by-Step Instructions
- Prepare Your Muffin Tin: Lightly grease a standard 12-cup muffin tin. Preheat your oven to 375°F (190°C).
- Sauté the Aromatics: Heat olive oil in a large skillet over medium heat. Add diced onion, carrots, and celery. Cook for 5-7 minutes, until softened.
- Build the Flavor Base: Stir in the whole wheat flour, thyme, and garlic powder. Cook for 1 minute, stirring constantly, to create a roux.
- Create the Creamy Sauce: Gradually whisk in the low-sodium chicken broth and almond milk. Bring the mixture to a gentle simmer, stirring until the sauce thickens.
- Combine Filling Ingredients: Remove the skillet from heat. Stir in the shredded cooked chicken and thawed frozen peas. Season with salt and black pepper to taste.
- Prepare the Crusts: On a lightly floured surface, roll out the puff pastry or pie crusts. Using a 3.5-4 inch round cookie cutter, cut out 12 circles for the bottoms and 12 slightly smaller circles (or use a smaller cutter) for the tops of your Mini Chicken Pot Pies. Alternatively, you can use the same size cutter for both and just crimp the edges.
- Assemble the Pot Pies: Gently press the larger pastry circles into the bottom and up the sides of each muffin cup. Fill each cup with a generous spoonful of the chicken and vegetable mixture.
- Add the Top Crust: Place the smaller pastry circles on top of the filling, gently pressing the edges to seal them to the bottom crust. You can crimp the edges with a fork for a decorative finish.
- Egg Wash and Bake: Brush the tops of the pot pies with the whisked egg wash. Bake for 20-25 minutes, or until the crust is golden brown and the filling is bubbly.
- Cool and Serve: Let your Mini Chicken Pot Pies cool in the muffin tin for a few minutes before carefully removing them. Serve warm and enjoy!

After learning how to prepare the filling for your Mini Chicken Pot Pies, you might want to try another delicious dish like Apple Butter Pork, which boasts a unique sweet and savory blend that complements hearty meals.
Pro Tips for Success
- Batch Cooking Chicken: Cook a large batch of chicken breast at the beginning of the week to easily incorporate into these Mini Chicken Pot Pies and other meals, saving valuable time.
- Don’t Overfill: Leave a little room at the top of each muffin cup to prevent overflow during baking and ensure your top crust seals properly.
- Vent the Tops: Before baking, cut a small slit or poke a few holes in the center of the top crusts to allow steam to escape. This prevents soggy crusts and helps achieve that perfect golden-brown finish.
- Thaw Pastry Properly: Ensure your puff pastry or pie crusts are fully thawed but still cold enough to work with. If they get too warm, they become sticky and difficult to handle.
- Control Sodium: Opt for low-sodium chicken broth to better manage your sodium intake, which is crucial for overall wellness. Taste and adjust salt only at the end. Mastering these tips will ensure your Mini Chicken Pot Pies are perfectly flaky and delicious every time.

Storage & Reheating Tips
Once cooled completely, store your Mini Chicken Pot Pies in an airtight container in the refrigerator for up to 3-4 days. For longer storage, these individual pot pies freeze beautifully. Wrap each cooled pot pie tightly in plastic wrap, then place them in a freezer-safe bag or container for up to 2-3 months.
Reheat from refrigerated by baking in a preheated oven at 350°F (175°C) for 15-20 minutes, or until warmed through. From frozen, bake at the same temperature for 30-40 minutes, covering loosely with foil if the crust starts to brown too quickly. A microwave can work for a quick reheat, but the crust won’t be as crisp. These adaptable Mini Chicken Pot Pies are a fantastic meal prep solution.
For those interested in meal prep, check out The Gelatin Trick Diet, which provides useful tips for storage and extending the shelf life of your lovely Mini Chicken Pot Pies while maintaining flavor and texture.
What to Serve With This Recipe
These comforting Mini Chicken Pot Pies pair wonderfully with light, fresh sides that complement their richness.

- Crisp Green Salad: A simple mixed green salad with a vinaigrette dressing offers a refreshing contrast and adds essential fiber.
- Roasted Asparagus: Lightly roasted asparagus spears with a squeeze of lemon provide a vibrant, nutrient-dense vegetable.
- Steamed Green Beans: Quick and easy, steamed green beans retain their crunch and bright color, making them a perfect companion.
- Cauliflower Rice Pilaf: For an extra serving of vegetables and a lower-carb option, a flavorful cauliflower rice pilaf works beautifully.
Frequently Asked Questions (FAQ)
Can I make these Mini Chicken Pot Pies ahead of time?
Absolutely! You can assemble the Mini Chicken Pot Pies completely and store them unbaked in the refrigerator for up to 24 hours. Just cover them loosely with plastic wrap.
When ready to bake, add a few extra minutes to the baking time. Alternatively, bake them fully, cool, and then reheat as instructed for quick meals.
Are these Mini Chicken Pot Pies suitable for individuals managing diabetes?
Yes, they are! As Rocco Fuhrman, my focus is always on science-backed, diabetes-friendly recipes. These Mini Chicken Pot Pies use whole wheat flour and reduced-fat pastry to increase fiber and reduce saturated fat.
We also prioritize lean protein and plenty of non-starchy vegetables. Portion control with individual servings is a key benefit, helping manage blood sugar levels effectively. Always consult with your healthcare provider or a registered dietitian for personalized dietary advice.
What other proteins can I use in these Mini Chicken Pot Pies?
While chicken is classic, feel free to get creative! Leftover cooked turkey is an excellent substitute, especially after holidays. For a vegetarian option, consider using cooked lentils, cannellini beans, or a mix of hearty mushrooms and extra vegetables like diced zucchini or corn. Just ensure your chosen protein is cooked and seasoned before adding it to the filling for the best flavor in your Mini Chicken Pot Pies.
Mini Chicken Pot Pies are a beloved comfort food that entices with their flaky crust filled with a savory mixture of chicken and vegetables. These delicious pastries not only provide a satisfying meal but also showcase the versatility of pie-making, often featuring many variations to suit different dietary preferences and tastes, such as in gluten-free options or with added herbs.
Final Thoughts
Creating these Mini Chicken Pot Pies is more than just cooking; it’s an act of love for your family and yourself. You’re providing comfort, nutrition, and deliciousness, all while simplifying healthy eating. Embrace the ease and joy these little pies bring, knowing you’re making smart choices for long-term wellness, one wholesome bite at a time. Empower your plate, empower your life.
Nutrition Information (per serving)
| Nutrient | Amount |
|---|---|
| Calories | 320 kcal |
| Total Fat | 16g |
| Saturated Fat | 5g |
| Cholesterol | 45mg |
| Sodium | 450mg |
| Total Carbohydrates | 28g |
| Dietary Fiber | 4g |
| Total Sugars | 3g |
| Protein | 20g |

Mini Chicken Pot Pies
Ingredients
Method
- Lightly grease a standard 12-cup muffin tin and preheat your oven to 375°F (190°C).
- Heat olive oil in a large skillet over medium heat, and add onion, carrots, and celery. Cook for 5-7 minutes until softened.
- Stir in whole wheat flour, thyme, and garlic powder, cooking for 1 minute to create a roux.
- Gradually whisk in chicken broth and almond milk, bringing to a simmer until sauce thickens.
- Remove from heat, stir in chicken and peas, and season with salt and pepper.
- On a floured surface, roll out pastry, cut out circles for the bottoms and tops.
- Press larger circles into muffin cups, fill with chicken mixture, and place smaller circles on top sealing the edges.
- Brush with egg wash and bake for 20-25 minutes until golden brown.
- Let cool before serving.
Notes

Diabetes Nutrition Specialist | Healthy Diet Advocate | Founder of GoldFoodie.
My passion for nutrition began with a deeply personal journey supporting my father through his battle with diabetes. Watching his daily struggles made me realize how powerful the right food choices can be in improving quality of life. That experience drove me to dedicate my career to helping others live healthier, more balanced lives.
- Rocco Fuhrman

- Rocco Fuhrman
- Rocco Fuhrman
- Rocco Fuhrman