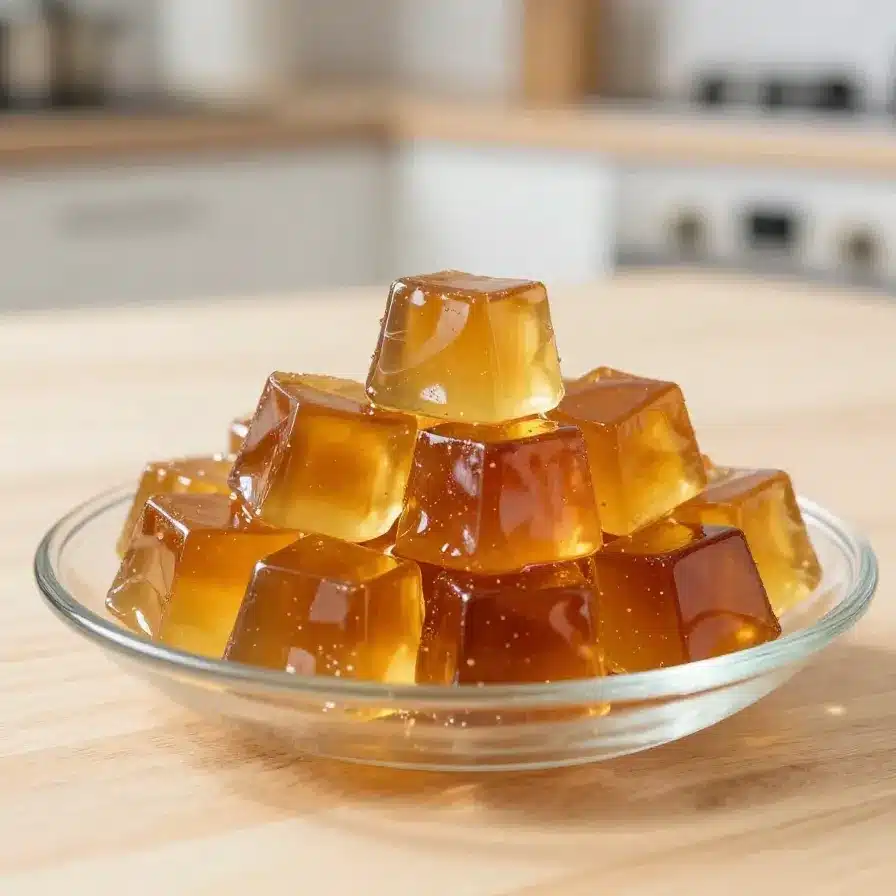
Discover the delightful simplicity of Hojicha Jelly, a uniquely refreshing Japanese dessert. This light and satisfying treat features the distinct roasted flavor of hojicha green tea, offering a wonderfully delicate sweetness. It is incredibly easy to prepare, making it perfect for both beginners and busy home cooks.
To learn more about this distinct roasted green tea, including its unique flavor profile and potential health benefits, consider exploring resources dedicated to Hojicha. Embrace this traditional Japanese dessert with a modern twist.
Table of Contents
Why You’ll Love This Hojicha Jelly Recipe
This Hojicha Jelly recipe quickly becomes a favorite for many great reasons. You will appreciate its unique appeal.
- Enjoy a light and satisfying dessert that won’t weigh you down.
- This recipe is quick and simple to make, perfect for busy schedules.
- It is an ideal treat for tea enthusiasts, showcasing hojicha’s distinctive flavor.
- Easily adapt this recipe to be vegan-friendly, accommodating various dietary needs.
- Serve it chilled for a wonderfully refreshing dessert, especially enjoyable on hot days.

Ingredients for Hojicha Jelly
Crafting this delicate Hojicha Jelly requires only a few essential components. Each ingredient plays a vital role in achieving its unique flavor and texture. Gather these items to begin your delicious dessert journey.
- Hojicha (roasted green tea) powder: 1 Tbsp (4.5 g; or brew 2½ cups / 600 ml of strong hojicha)
- Water: 2½ cups (or use strongly brewed hojicha instead)
- Sugar: ¼ cup
- Kanten (agar) powder: 1 stick packet (4 g per stick; or see Notes)
- Sweetened condensed milk: 3 Tbsp (skip for vegan/vegetarian)
- Milk: 3 Tbsp (skip for vegan/vegetarian)
Notes & Substitutions
You have flexibility with certain ingredients for your Hojicha Jelly. Using hojicha powder yields a more intense flavor and vibrant color. Alternatively, brewing strong hojicha tea offers a milder taste and skips the powder.
Kanten powder provides a firm, clear, heat-stable jelly, ideal for this dessert. Agar-agar powder is a direct substitute for kanten. You can also use 4 tsp of gelatin powder if kanten is unavailable, though the texture will be slightly different. Adjust the sugar amount to your personal sweetness preference. For a delicious vegan topping, serve your jelly with kuromitsu, a Japanese black sugar syrup.
Equipment
Gathering the right tools simplifies your jelly-making process. You will need a small saucepan or pot to combine and heat ingredients. A whisk is essential for thorough mixing and preventing lumps. Prepare a square or rectangular mold (like a nagashikan or baking pan) for setting the jelly.
An optional butane torch or spoon helps remove surface bubbles. Finally, use a sharp knife for precise cutting and serving dishes for presentation.
How To Make Hojicha Jelly
Making this Hojicha Jelly is a straightforward process. Before you start, remember this recipe requires at least 2 hours of cooling and chilling time. Gather all your ingredients. If using brewed hojicha tea, prepare it now and omit the hojicha powder later. We use more water than typical kanten recipes for a softer texture. For an even softer jelly, add a little extra water.
First, combine 2½ cups water (or strong hojicha) and 1 stick kanten powder in a saucepan. Whisk this mixture well as you bring it to a boil over medium heat. Once boiling, reduce the heat to low and simmer for 2 minutes, whisking occasionally. This ensures the kanten fully dissolves.
Turn off the heat. Immediately add ¼ cup sugar and 1 Tbsp hojicha powder to the saucepan. Whisk vigorously until the sugar dissolves completely and the hojicha powder is thoroughly incorporated. Do not worry about small specks; ground tea leaves will not fully dissolve.
Prepare your mold. Run a square or rectangular mold (such as a 15 x 14 cm nagashikan or an 8 x 8 inch baking pan) under tap water. Shake off excess water but do not wipe it dry; the moisture prevents sticking. Pour the hot hojicha mixture into the wet mold.
Remove any surface bubbles. Quickly touch them with the flame from a butane torch or a long-stemmed lighter. Alternatively, scoop them off with a spoon or pop them with a toothpick, though these methods are more time-consuming.
Let the mixture cool and solidify on your countertop until it reaches room temperature, about 45-60 minutes. The Hojicha Jelly will set before it fully cools. Cover the mold with plastic wrap, adding a sheet of paper towel underneath to absorb condensation, and refrigerate for at least 1 hour until thoroughly chilled.
To Make the Topping:
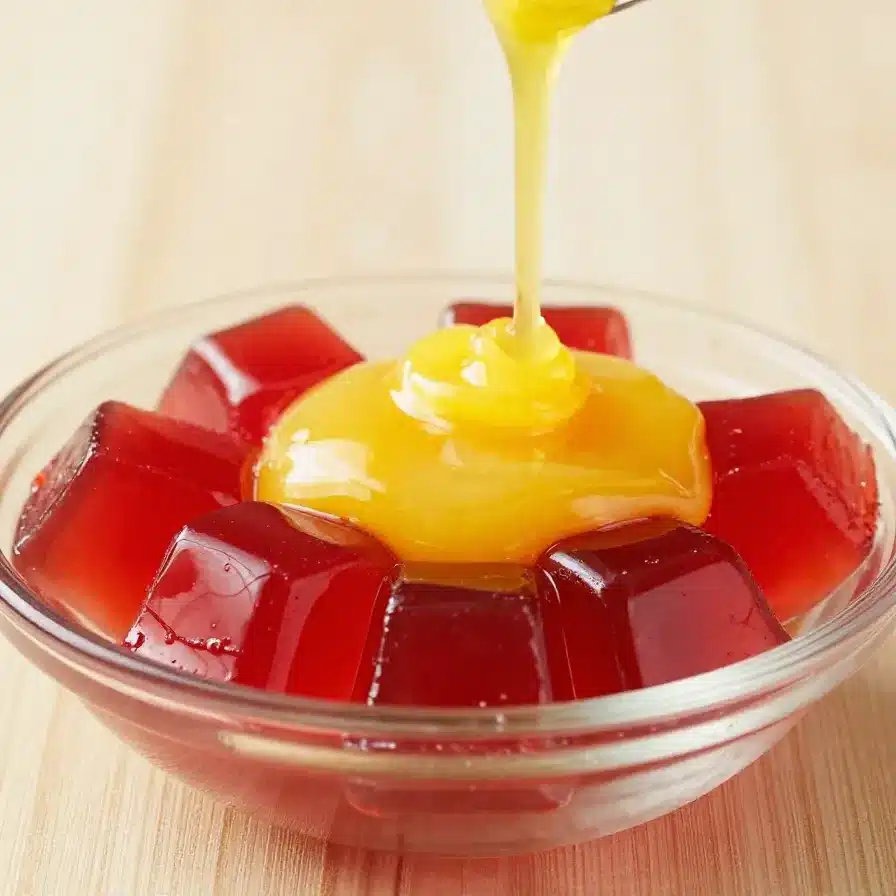
Combine 3 Tbsp sweetened condensed milk and 3 Tbsp regular milk. Mix well until smooth. Adjust the consistency and sweetness to your preference, adding more condensed milk for a sweeter, thicker topping. This Hojicha Jelly is vegan-friendly if you omit the condensed milk topping.
For a delicious vegan alternative, serve with kuromitsu (Japanese black sugar syrup), which you can make from scratch.
To Serve:
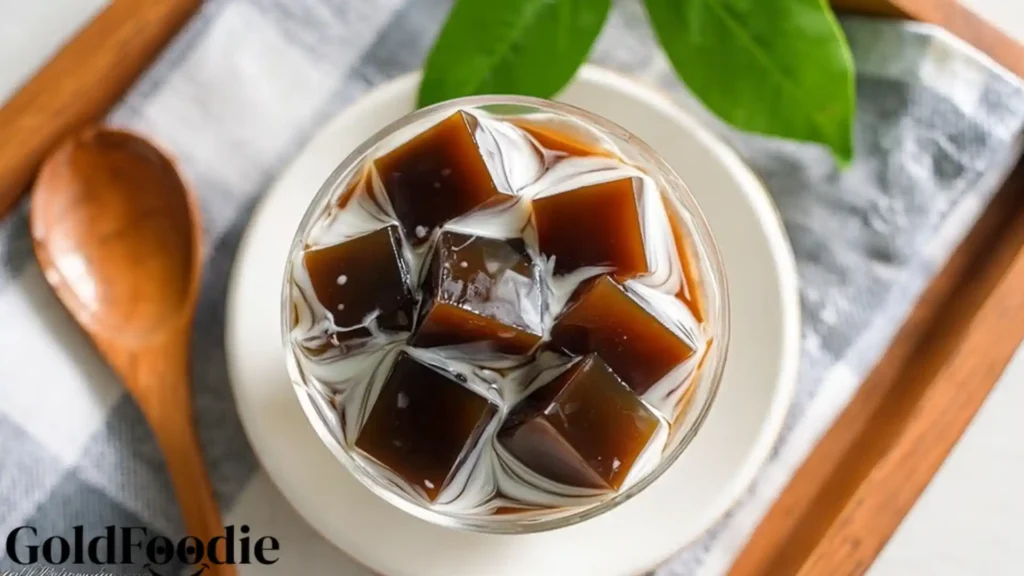
Gently remove the set jelly from the mold. If you used a pan, run a knife along the edges, then quickly invert it onto a cutting board. Cut the jelly into ½-inch (1.3-cm) slabs, then into sticks, and finally into ½-inch (1.3-cm) cubes. Transfer the cubed jelly to individual serving dishes. Pour some of the sweetened condensed milk mixture over each portion. Enjoy your refreshing Hojicha Jelly!

To Store:
Transfer any leftover jelly to an airtight container or cover the serving bowls with plastic wrap. Store it in the refrigerator for up to 3 days. Do not freeze the jelly.
Pro Tips for Perfect Hojicha Jelly
Achieve the best texture and flavor for your Hojicha Jelly with these expert tips.
- Ensure the kanten powder fully dissolves by boiling and whisking for the recommended time.
- Whisk the mixture constantly during boiling to prevent lumps and ensure even setting.
- Adjust the water amount slightly if you prefer a firmer or softer jelly consistency.
- Use a wet mold to prevent the jelly from sticking, making unmolding much easier.
- Quickly remove any air bubbles from the surface for a smooth, clear finish.
- Chill the jelly thoroughly in the refrigerator for at least an hour for the best texture.
- Experiment with the amount of hojicha powder to find your preferred tea intensity.
Serving Suggestions & Variations
Elevate your Hojicha Jelly experience with diverse serving ideas and creative variations.
- Serve simply with the traditional sweetened condensed milk topping for a creamy complement.
- Offer kuromitsu, Japanese black sugar syrup, as a sophisticated and vegan-friendly alternative.
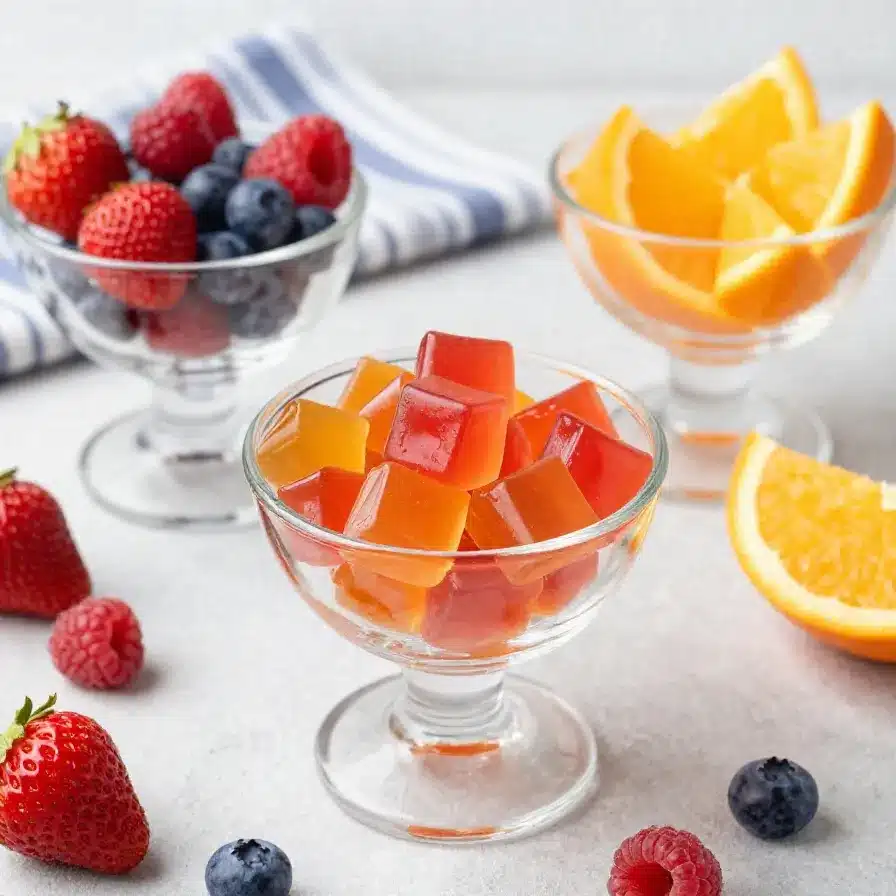
- Pair your jelly cubes with fresh seasonal fruits like berries or mango for added sweetness and color.
- Add a scoop of vanilla or green tea ice cream alongside the Hojicha Jelly for a decadent dessert.
- Experiment with different tea powders such as matcha or sencha for varied flavors and colors.
- Create a visually stunning dessert by making layered jelly with contrasting colors or flavors.
- Present the jelly in elegant individual glasses for a more refined and impressive presentation.

Storage Instructions
Proper storage helps maintain the freshness and texture of your Hojicha Jelly. After preparing and chilling, transfer any leftover jelly to an airtight container. Alternatively, cover individual serving bowls tightly with plastic wrap. Store the jelly exclusively in the refrigerator.
It will remain fresh and delicious for up to 3 days. Freezing jelly is not recommended as it significantly alters the delicate texture. For best results, store the jelly and any toppings separately until serving.
Nutrition Information
This Hojicha Jelly provides a light and satisfying treat. Here is an estimated nutritional breakdown per serving.
| Nutrient | Amount |
|---|---|
| Calories | 106 kcal |
| Carbohydrates | 22 g |
| Protein | 2 g |
| Fat | 2 g |
| Saturated Fat | 1 g |
| Cholesterol | 6 mg |
| Sodium | 32 mg |
| Fiber | 0.1 g |
| Sugar | 21 g |
| Unsaturated Fat | 0.5 g |
| Serving Size | 1 serving |
Frequently Asked Questions (FAQs)
Can I use agar-agar instead of kanten?
Yes, agar-agar powder is a direct substitute for kanten powder in this Hojicha Jelly recipe. Use the same quantity for similar results.
Can I use gelatin instead of kanten?
You can use gelatin, but the texture will be different; gelatin results in a softer, more wobbly jelly. Use 4 teaspoons of gelatin powder as an alternative.
How long does Hojicha Jelly last?
Properly stored in an airtight container in the refrigerator, Hojicha Jelly stays fresh for up to 3 days. Consume it within this timeframe for the best quality.
Is this recipe vegan?
Yes, the jelly itself is vegan if you use kanten or agar-agar. Simply skip the sweetened condensed milk topping and opt for kuromitsu instead.
Can I adjust the sweetness?
Absolutely, you can easily adjust the amount of sugar in the recipe to suit your taste. Add more for a sweeter jelly or less for a milder flavor.
Final Thoughts
Embrace the exquisite simplicity and refreshing taste of Hojicha Jelly. This easy-to-make Japanese dessert offers a unique culinary experience, bringing the subtle, roasted notes of hojicha tea to your table. Its light texture and delicate sweetness make it an ideal treat for any occasion. We encourage you to try preparing this delightful Hojicha Jelly recipe today and discover its charm. Share your creations and thoughts in the comments below!

Hojicha Jelly: A Refreshing Japanese Roasted Green Tea Dessert
Ingredients
Equipment
Method
- Gather all ingredients and, if using strong hojicha instead of powder, brew it now; note that this recipe requires 2+ hours of cooling and chilling time.
- In a saucepan, combine water (or strong hojicha) and kanten powder; whisk, bring to a boil over medium heat, then simmer on low for 2 minutes, whisking occasionally.
- Remove from heat, add sugar and hojicha powder, then whisk until dissolved and fully incorporated without lumps.
- Prepare a mold (like a nagashikan or baking pan) by rinsing it with water and shaking off excess, leaving it undried, to prevent sticking.
- Pour the hot hojicha mixture into the mold and remove any surface bubbles using a butane torch or by scooping/popping them.
- Allow the jelly to cool and solidify at room temperature for 45-60 minutes, then cover and refrigerate for at least 1 hour to chill.
- For the topping, combine sweetened condensed milk and milk, mixing well and adjusting consistency/sweetness as desired; skip for vegan/vegetarian, or use kuromitsu.
- Remove the chilled jelly from its mold, cut into ½-inch slabs, then sticks, and finally ½-inch cubes. Serve in individual dishes topped with the sweetened condensed milk mixture.
- Store leftover jelly in an airtight container or covered in the refrigerator for up to 3 days; do not freeze.
Notes

Diabetes Nutrition Specialist | Healthy Diet Advocate | Founder of GoldFoodie.
My passion for nutrition began with a deeply personal journey supporting my father through his battle with diabetes. Watching his daily struggles made me realize how powerful the right food choices can be in improving quality of life. That experience drove me to dedicate my career to helping others live healthier, more balanced lives.
- Rocco Fuhrman

- Rocco Fuhrman
- Rocco Fuhrman
- Rocco Fuhrman