The holiday season means it’s time for baking, and nothing beats classic Holiday Sugar Cookies! This foolproof recipe delivers soft, thick centers and crisp, buttery edges, holding their perfect cut-out shapes every time. You’ll love the rich vanilla flavor. Plus, we’re using an easy, non-royal glaze icing that makes decorating simple and fun for everyone. Let’s get baking!
Table of Contents
Why You’ll Love These Holiday Sugar Cookies
- Soft, thick centers with crisp edges: Each bite offers the perfect texture combination.
- Rich, buttery vanilla flavor: A hint of almond extract elevates these classic treats.
- Simple, accessible ingredients: You likely have most items in your pantry already.
- Cookies hold their cut-out shape: No more blurry designs, just perfect festive shapes.
- Easy, beginner-friendly glaze icing: Achieve beautiful decorated cookies without complicated royal icing.
- Freezes beautifully for make-ahead: Prepare dough or baked cookies in advance to save time.
- Step-by-step instructions for success: Our guide ensures even beginners can make stunning Holiday Sugar Cookies.

Ingredients
Gather these simple ingredients to create your batch of delightful holiday cut-out cookies. Using high-quality ingredients truly makes a difference in the final flavor of your Holiday Sugar Cookies.
Cookies
- 2 and 1/4 cups (281g) all-purpose flour (spooned and leveled), plus more as needed for rolling and work surface
- 1/2 teaspoon baking powder
- 1/4 teaspoon salt
- 3/4 cup (12 Tbsp; 170g) unsalted butter, softened to room temperature
- 3/4 cup (150g) granulated sugar
- 1 large egg, at room temperature
- 2 teaspoons pure vanilla extract
- 1/4 or 1/2 teaspoon almond extract (optional, but makes the flavor outstanding)
Easy Icing
- 3 cups (360g) confectioners’ sugar
- 1/2 teaspoon pure vanilla extract (omit and replace with water for stark white icing)
- 2 teaspoons light corn syrup
- 4.5–5 Tablespoons (67–75ml) room temperature water
- Pinch salt
- Optional: gel food coloring & sprinkles for decorating
Notes & Substitutions
Ensure butter and eggs are at room temperature for a smooth, cohesive dough. Cold ingredients can lead to a lumpy dough that won’t blend correctly. For flavor alternatives, consider adding maple, peppermint, or lemon extract or fresh zest for a different twist. If you don’t have corn syrup, you can omit it; the icing will still work, but it might have less sheen. To halve the recipe, use a small egg or crack a large egg, whisk, and use half.
Equipment
You don’t need fancy tools to make these classic treats. Here’s what you’ll need for your festive cookie baking:
- Electric mixer (stand or handheld)
- Baking sheets
- Parchment paper or silicone baking mats
- Rolling pin (optional: adjustable)
- Holiday cookie cutters
- Gel food coloring
- Squeeze bottles or piping bags/tips (Wilton #4 recommended)
- Wire rack for cooling
How To Make Holiday Sugar Cookies
Making perfect Holiday Sugar Cookies is a fun and rewarding process. Follow these step-by-step instructions for delicious results. Plan ahead for chilling dough and drying icing to ensure the best outcome.

- Preparation Timeline: Allow enough time for dough chilling (1-2 hours), cookie cooling, and icing drying (24 hours for full set). If you are enjoying them immediately and don’t mind softer icing, you’ll need about 3-4 hours total.
- Make the Cookie Dough:
- Whisk the flour, baking powder, and salt together in a medium bowl. Set it aside.
- In a large bowl, use a handheld or stand mixer fitted with a paddle attachment. Beat the softened butter and granulated sugar on high speed until they are completely smooth and creamy, about 3 minutes.
- Add the room temperature egg, vanilla extract, and optional almond extract. Beat on high speed until just combined, about 1 minute. Scrape down the sides and bottom of the bowl as needed.
- Gradually add the dry ingredients to the wet ingredients. Mix on low speed until they are just combined. The dough will be a bit soft. If the dough seems too soft or sticky, add 1 extra tablespoon of flour.
- Roll and Chill the Dough:
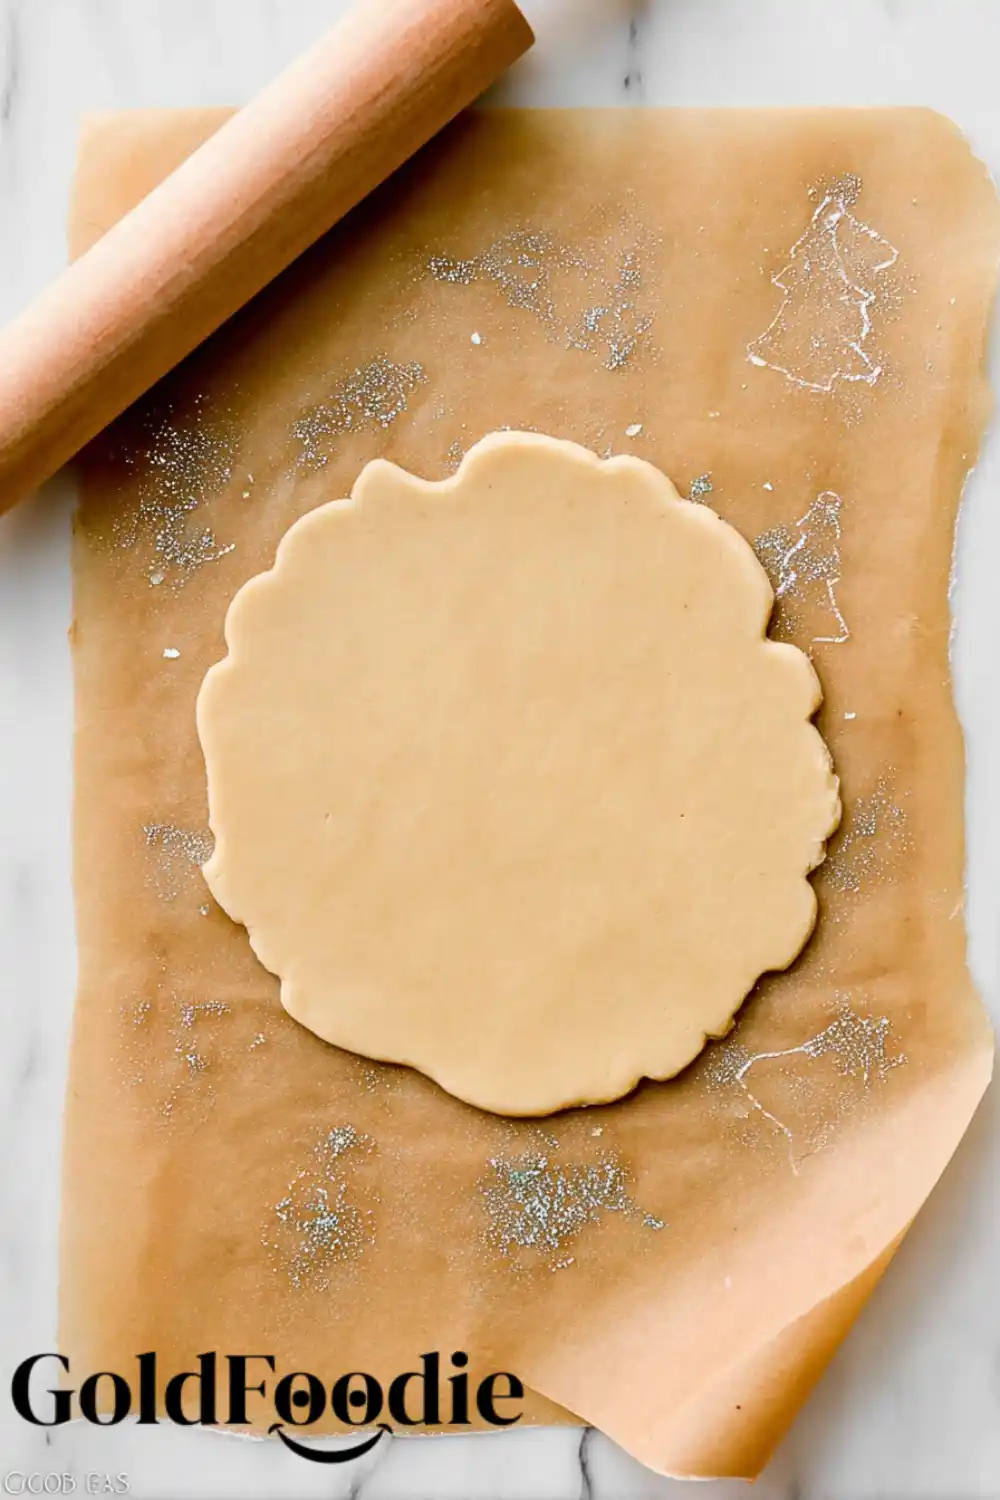
- Divide the dough into two equal parts. Place each portion onto a piece of lightly floured parchment paper or a silicone baking mat.
- With a lightly floured rolling pin, roll each dough portion out to about 1/4-inch thickness. Ensure the thickness is even.
- Lightly dust one rolled-out dough with flour, then place a piece of parchment paper on top. Stack the second rolled-out dough on top. Cover with plastic wrap or aluminum foil.
- Refrigerate the stacked dough for at least 1–2 hours, or up to 2 days. Chilling is crucial for easy handling and preventing spread.
- Cut and Bake Cookies:
- Once the dough is chilled, preheat your oven to 350°F (177°C). Line 2–3 large baking sheets with parchment paper or silicone baking mats.
- Carefully remove one piece of chilled dough from the refrigerator. If it sticks, gently run your hand underneath to help release it.
- Use your favorite holiday cookie cutters to cut shapes from the dough. Re-roll any remaining dough scraps and cut more cookies until all the dough is used. Repeat with the second piece of dough.
- Arrange the cut cookies on the prepared baking sheets, spacing them about 3 inches apart.
- Bake for 11–12 minutes, or until the edges are lightly golden. Rotate the baking sheets halfway through if your oven has hot spots.
- Allow the cookies to cool on the baking sheet for 5 minutes. Then, transfer them to a wire rack to cool completely before decorating. You do not need to cover them as they cool.
- Make the Easy Icing:
- In a medium bowl, use a fork to stir together the confectioners’ sugar, vanilla extract, light corn syrup, 4.5 tablespoons of room temperature water, and a pinch of salt. It will be very thick initially.
- Switch to a whisk and whisk in the remaining 1/2 tablespoon of water. Continue whisking, adding a tiny bit more water if needed, until the icing forms a ribbon that holds its shape for a few seconds when drizzled back into the bowl. This indicates the correct consistency.
- Decorate the Cookies:
- If desired, tint portions of the icing with gel food coloring. Start with 1-2 drops, mix, and add more until you reach your desired shade. Remember that color deepens as the icing dries.
- Transfer the icing to squeeze bottles or piping bags fitted with small tips (like Wilton Piping Tip #4).
- Decorate your cooled Holiday Sugar Cookies as you wish. Outline the cookies first, then flood the centers. If adding sprinkles, do so immediately while the icing is still wet.
- Let Icing Dry:
- You can enjoy the cookies before the icing fully dries if you prefer. For a completely set, hardened icing, allow them to air dry uncovered for 24 hours at room temperature.
- For a slightly faster drying process, you can place the decorated cookies (on their baking sheet) into the refrigerator. Once the icing is firm, these festive treats are perfect for gifting or sharing.

Pro Tips & Troubleshooting
Achieving perfect Holiday Sugar Cookies is simple with a few key tricks. Pay close attention to these details for the best results.
- Accurate Ingredient Measurements: Always spoon and level your flour. Too much flour makes dry cookies; too little causes spreading. Understanding proper ingredient measurement techniques is fundamental for successful baking.
- Do Not Overmix Dough: Overmixing develops gluten, leading to tough cookies. Mix only until ingredients are just combined.
- Chill Dough Before Cutting: Chilled dough is firmer and prevents cookies from spreading in the oven, ensuring sharp shapes. According to King Arthur Baking, chilling cookie dough allows fats to solidify, which prevents spreading and enhances flavor.
- Avoid Overcrowding Baking Sheets: Leave ample space between cookies to allow for even baking and proper air circulation.
- Adjust Icing Consistency: For outlining, icing should be thicker; for flooding, it needs to be slightly thinner to spread smoothly.
- Use Gel Food Coloring: Gel colors are concentrated and won’t thin your icing, unlike liquid food colorings.
Serving, Storage, & Variations
These versatile Holiday Sugar Cookies are perfect for many occasions. Knowing how to serve and store them properly ensures they stay fresh and delicious.
- Serving Suggestions:
- Arrange them beautifully on platters for holiday parties and family gatherings.
- Package them in decorative boxes or bags for thoughtful homemade gifts or party favors.
- Storage Instructions:
- Store decorated cookies in an airtight container at room temperature for up to 5 days, once the icing has fully dried.
- Undecorated, baked cookies can be stored in an airtight container at room temperature for up to a week, or in the refrigerator for up to 10 days.
- Freezing Options:
- Freeze baked, plain cookies in an airtight container for up to 3 months. Thaw at room temperature before decorating.
- Freeze baked, decorated cookies (with fully set icing) for up to 3 months. Layer them with parchment paper. Thaw at room temperature.
- Freeze raw dough discs wrapped tightly for up to 3 months. Thaw in the refrigerator overnight before rolling and cutting.
Nutrition Information
Please note that the nutritional information provided here is an estimate. It is based on average ingredient values and does not account for specific brands, substitutions, or decorating additions like sprinkles. For precise values, we recommend calculating them based on the exact ingredients and quantities you use.
| Nutrient | Amount Per Cookie (Approx.) |
|---|---|
| Calories | 150-180 |
| Total Fat | 7-9g |
| Saturated Fat | 4-5g |
| Cholesterol | 20-25mg |
| Sodium | 30-40mg |
| Total Carbs | 20-25g |
| Sugars | 15-20g |
| Protein | 1-2g |
Frequently Asked Questions (FAQ)
Got questions about making these delightful Holiday Sugar Cookies? We have answers to help you succeed.
Why do my sugar cookies spread?
Your dough might be too warm, or you may have used too much butter or not enough flour. Ensure accurate measurements and chill the dough thoroughly.
Can I use royal icing instead?
Absolutely! This recipe works beautifully with royal icing if you prefer that traditional, harder finish for your decorated cookies.
How long does the icing take to dry?
This easy glaze takes about 24 hours at room temperature to fully harden, ensuring they stack and store without smudging.
Can I make the dough ahead of time?
Yes, you can prepare the dough and refrigerate it for up to 2 days before rolling and cutting, or freeze it for up to 3 months.
What are the best cookie cutters to use?
Sturdy metal cookie cutters are ideal as they create clean, sharp edges on your dough. Choose your favorite festive shapes!
Final Thoughts
Baking Holiday Sugar Cookies is a treasured tradition, and this simple, beginner-friendly recipe ensures everyone can enjoy creating delicious, beautifully decorated treats. With soft centers, crisp edges, and an easy glaze, these cookies are perfect for gifting, parties, or simply enjoying with loved lovers. We hope you create wonderful memories in the kitchen. Share your festive creations with us and let us know how your holiday sugar cookies turn out!

Easy Cut-Out Holiday Sugar Cookies
Ingredients
Equipment
Method
- Ensure you have enough time and space to make these cookies, as the dough requires chilling, cookies need cooling, and icing takes up to 24 hours to set.
- Whisk together flour, baking powder, and salt in a medium bowl, then set it aside.
- In a large bowl, use a mixer to beat softened butter and granulated sugar until smooth and creamy, about 3 minutes. Add the egg, vanilla, and optional almond extract, then beat for about 1 minute until combined, scraping down the bowl as needed.
- Add the dry ingredients to the wet and mix on low speed until just combined; if the dough is too soft, add 1 more Tablespoon of flour.
- Divide the dough into two equal parts, place each on lightly floured parchment or a silicone mat, and roll to an even 1/4-inch thickness, adding more flour if necessary.
- Lightly dust one rolled dough with flour, cover with parchment, then layer the second rolled dough on top. Cover and refrigerate for at least 1–2 hours or up to 2 days.
- Preheat oven to 350°F (177°C) and line baking sheets. Remove chilled dough, cut into shapes with a cookie cutter, then re-roll the remaining dough scraps and continue cutting. Repeat with the second piece of dough.
- Arrange cookies about 3 inches apart on baking sheets and bake for 11–12 minutes, or until the edges are lightly browned. Let cookies cool on the baking sheet for 5 minutes, then transfer them to a wire rack to cool completely before decorating.
- Using a fork, stir confectioners’ sugar, vanilla, corn syrup, 4.5 Tablespoons of water, and optional salt in a medium bowl until very thick. Switch to a whisk and add an additional 1/2 Tablespoon of water at a time until the icing forms a ribbon that holds shape for a few seconds before melting back into itself.
- If tinting the icing, stir in gel food coloring starting with 1–2 drops, adding more as needed to reach the desired color, remembering that color darkens as it dries.
- Decorate cookies as desired by dipping them into the icing, or using squeeze bottles or piping bags with tips (e.g., Wilton #4) to outline and fill. If adding sprinkles, do so immediately after applying icing.
- You can enjoy cookies before the icing completely dries, which typically takes 24 hours; no need to cover them during this time. Store decorated cookies covered for up to 5 days at room temperature or up to 10 days in the refrigerator.
Notes
Hi there, I’m chef living in New York City. Every morning, I wake up to the sounds of my little one’s laughter and the comforting routine of preparing breakfast for my family my husband, our child, and my beloved mother, who’s become both my rock and my inspiration since my father passed away. As the only daughter left in our family, I feel a deep responsibility to carry on his memory whenever I step into the kitchen.


